Guatemalan Tamales – Final


Guatemalan tamales have been a staple of native cuisine since ancient Mayan and Aztec times and can be traced back to 8000-5000 BC (Hoyer 2008). The Mayans and Aztecs were known to take women along with them in battle so that they could cook for them. The women were charged with making the masa for tortillas meats, stews and drinks, and soon, tamales were conceived as a convenient food developed to feed the soldiers while they were in battle. The Mayan Empire inhabited the land we know today as Guatemala and “reached its peak from 300-900 AD before collapsing amid tribal feuding” (Thyberg 2016). Tamales are officially defined as “a Mexican dish of seasoned meat wrapped in cornmeal dough and steamed or baked in corn husks” (Merriam-Webster 2016). However, Guatemalan tamales have their own indigenous roots and therefore have several variations from the basic Mexican tamale as we know it today.

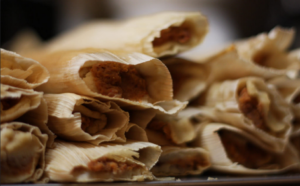
Tamales are typically enjoyed in Guatemala during Christmas and New Year’s but they are usually made for the weekends, specifically, Saturday’s. There are three different variations of the Guatemalan tamale that include: Colorado (red), negro (black), and chuchito (loosely translates into little dog). There is also a smaller tamale that is called a pache.

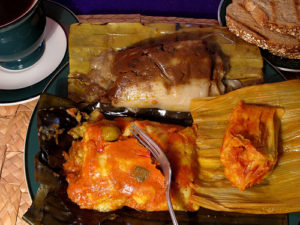
Credit Given to: Rudy A. Girón http://antiguadailyphoto.com/2006/12/25/guatemalan-tamales-for-christmas-colorado-negro-chuchito/#.WEeOSPkrLcu

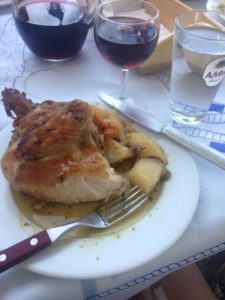
The only difference is the pache is made from potatoes rather than corn masa and they are only sold on Thursday’s, starting to see a trend here? Guatemalan’s definitely like to know what they’re eating on certain days of the week. Kind of like Taco Tuesday here in the United States. Tamales here in the United states hare available through select Guatemalan panaderias or bakeries. They are few and far between so I like to cling to the one we have frequented for the last 10 years Panaderia Guatemala located in Harbor City near the corner of Lomita Boulevard and Normandie. Tamales are usually served with a side of Guatemalan bread called a Pirujo, which is a lot like Hawaiian bread but a bit less sweet. It is also necessary to have a fresh slice of lime to squirt on top of the tamale to impart freshness. One important rule on Guatemalan tamale eating etiquette is that you can eat as many tamales as you want but you can only have one on your plate at a time.

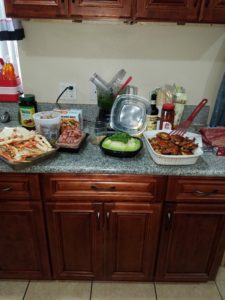
The only person in my family that I have actually seen make tamales from scratch was my great aunt my mom’s side, may God rest her soul. I chalk this up to the fact that we are all very busy with our lives and don’t have the time to actually make such a labor-intensive food. I often think that our Guatemalan ancestors were either really devoted to food or perhaps just had a lot of time on their hands. Nowadays, when we need tamales for Christmas and New Year’s we just order them from the Panaderia Guatemala and they magically appear warm and ready to go the day of. Although there are simpler recipes online, I wanted to share one that was as authentic as possible. The recipe that follows is one that I gathered from my grandmother telling me how to make them since my family has no actual written recipe and one that I found online at, The Weiser Kitchen, that is the closest in flavor, process, and style.

Ingredients:

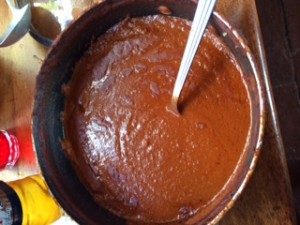
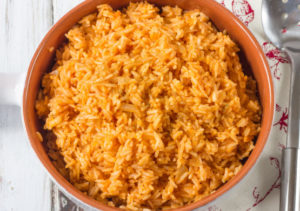
Credit Given to: Marla http://epicureantravel.com/guatemalan-tamales/

8 tomatoes whole

2 large yellow onions, peeled, cut in quarters

1 pound medium tomatillos

4 garlic cloves, peeled

1 tablespoon canola oil

3 fresh bay leaves

3 teaspoons fresh thyme

1 ounce dark chocolate

2 dried pasilla chiles

1 dried guacque (huaques) chile or dried guajillo chile

2 cups reserved chicken stock


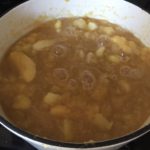
Crack or cut open the dried peppers, then shake out the seeds and snap off the stems. Tear or cut into coarse pieces and place in a large bowl. Warm 2 cups of the reserved chicken cooking liquid and place in the bowl with the peppers. Let stand, uncovered, for 5 to 8 minutes.

In a strong large blender or in a food processor, blend or process the tomatoes, onions, tomatillos and garlic until smooth, in batches if necessary. Transfer to a bowl.

Add the softened peppers and pepper soaking water to the processor and process until completely smooth. If the mixture is not completely pureed, you must strain it, no lumps allowed here!

Heat the oil in a large pot over high heat until shimmering. Add the pureed tomato and tomatillos, pureed peppers, bay leaves, and thyme. Cover and bring to a boil, then reduce heat to simmer and add the chocolate. Cover and cook over low heat for 1 hour, stirring occasionally.

For the Spice Mix:

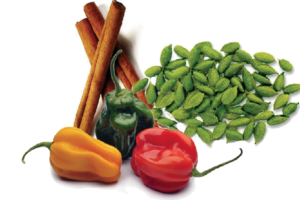
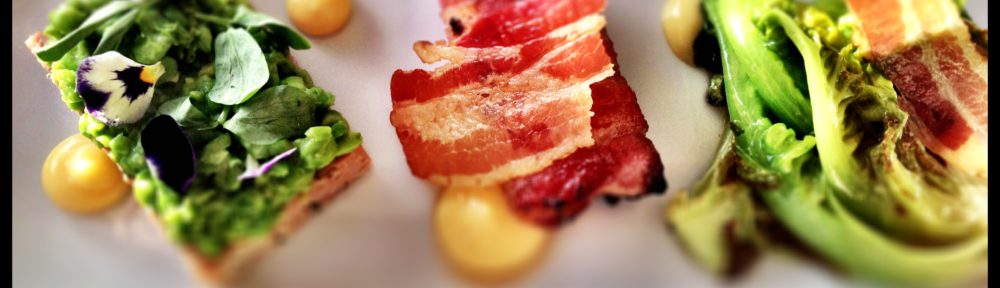
Credit Given to: Ken Veronda http://www.revuemag.com/2011/12/spices/

1 (2-inch) cinnamon sticks

3 tablespoons sesame seeds

2 tablespoons pumpkin seeds

1 teaspoon whole cumin seeds

½ teaspoon whole cloves

1 tablespoon rice flour

These must be toasted. Yes, all of them! In a food processor, finely grind the cinnamon, sesame seeds, pumpkin seeds, cumin, and cloves. Stir into the sauce. Whisk in the rice flour, and simmer over the lowest heat possible, 45 minutes. (Sauce can simmer for up to 3 hours, as long as it is covered and stirred occasionally to prevent burning).

For the Chicken Filling:

2 pounds chicken breasts

4 cups water

4 garlic cloves, peeled

3 celery stalks, leaves attached, roughly chopped

1 large onion, skin, stem, and root end removed

4 bay leaves, fresh preferred

1 teaspoon salt

½ teaspoon whole black peppercorns

In a large pot add all of the chicken filling ingredients. Cover and bring to a boil over high heat. Reduce the heat to a simmer and cook until the meat is fork tender, 45 minutes to 1 hour.

Remove the chicken from the cooking liquid and transfer to a bowl. Skim, strain and reserve the liquid. Pour broth over the meat until just covered. Reserve the remaining broth. Cool the meat in the broth. As soon as you can handle the chicken, remove the meat from the bone, tear into strips and return to the broth. The chicken can be prepared up to 2 days in advance. Cover and refrigerate the chicken in the broth.

For the Masa:

12½ cups of water, chicken stock or strained cooking liquid from the pork and/or chicken

2 pounds masa harina (instant masa)

8 ounces unsalted butter

½ cup canola oil

2 tablespoons kosher salt to taste

1 whole large yellow onion, peeled, stem, and root end removed

2 tablespoons kosher salt, or more to taste

Combine the water and masa in a large pot over medium heat. Cook, stirring, until warm, then add the butter (in chunks), whole onion, oil and salt. Continue to cook, stirring (like your life depended on it) with a strong spatula, until the masa thickens and becomes very pale in color (like cream of wheat), and a pasty residue appears around the pot, at least ½ hour. Remove from heat and transfer to a lightly oiled bowl. Cover with foil.

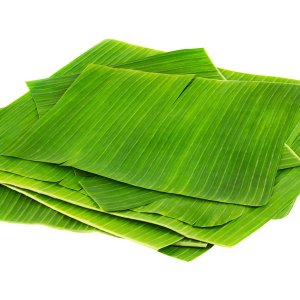
Credit Given to: https://freshproducegroup.us/product-tag/tamales-jarochos/

The leaves for Wrapping the Tamales:

40 large banana leaves, frozen and fully defrosted, or fresh

Parchment paper cut to size, each approximately 9 by 13-inches

4 red bell peppers, julienned or cubed

Green Olives (optional)

Kitchen twine

Fit a large pot with a steamer rack or a pasta insert and fill the bottom with any remaining stock and water to about ¼ to ½ inch below the steamer rack or the bottom of the pasta insert. Lay 1 to 2 banana leaves on the steamer to cover. Cover the pot, bring to a boil and reduce to a simmer while you make the tamales.

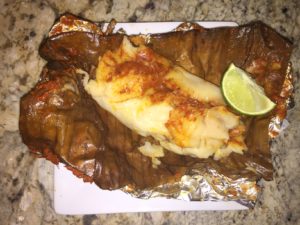
Place a piece of parchment paper on a work surface. Fold one long side of the paper over, about ½ inch, creating a small ledge (see the picture). Lay a banana leaf on the paper. Place ¼ cup masa on the leaf and flatten it out. Place 1 tablespoon sauce, then 1 tablespoon or about 1 ounce chicken over the masa. Add a few peppers or olives if you like them.

Fold the 2 short sides in towards the center until almost touching. Take the long side of the paper without the small fold and fold it over towards the center, Take the last side with the fold and fold it into the center to form a packet. Flip over and tie with kitchen twine both lengthwise and widthwise. (Or use a spare banana leaf, torn into strips). Place the packet, standing up in the steaming pot and cover. Make sure the water remains at a bare simmer, replenishing as necessary, without splashing the tamales. Repeat with remaining tamales.

Cover the packets with all remaining banana leaves. Cover the pot and steam for at least 45 minutes or up to 2 hours. Depending on the size of the pot here, remember that it could take up to 6 hours if you are using a traditional Guatemalan pot that can hold many tamales at the same time.

          Corn was vital in the sustainability of the Mayan Empire and they quickly developed ways to maximize their crops and farming techniques. They developed the slash and burn technique in which they would grow crops on a field for 2 years and then burn it to keep the soil fertilized and move on to a different plot of land. They would then return to the same field 5 years later. This allowed them to keep planting the same crops, mainly corn, squash, and beans while keeping the neighboring land fertile for future use.
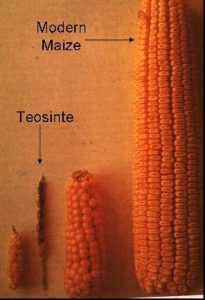
The ancient ancestor of the corn plant we see today was originally called teosinte and “grew wild on the Honduran/Guatemalan border and the Sierra Madre Mountain Range in Mexico” (“Maya Agriculture” 2016). Teosinte could be ground into flour or popped like popcorn, but the first varieties only had 6-10 kernels.

The corn we see today is the process of seed selection and cross breeding, can no longer grow wild on its own, and requires extensive weed cultivation and constant watering (Buiatti, Christou & Pastore 2013). The demand for growing corn and other crops for our growing population on earth has “led to the building of irrigation canals and farming terraces throughout the Western Hemisphere (“Maya Agriculture” 2016). This places a huge demand on our dependence on water especially here in California where we have experienced a prolonged drought. It is estimated that 80 percent of California’s water is used for agricultural production which puts things into perspective when we think of what we’re doing to combat the drought such as turning the water off when we brush our teeth and watering our lawns less. Maybe we need to take a closer look at agricultural water usage and how we can make that more efficient.

Guatemalans today still use corn for tortillas, tamales, breads, flours and even a hot drink called “atole”. In order to understand how important corn was to the Mayans I’d like to share the story of the Mayan Creation with you which explains why corn was so sacred to them. “According to Mayan Mythology God created man and woman from the seed of corn” and this solidifies just how vital this small grain was in culture and history for the people of Guatemala (“The Mixed Culture” 2014).

References

“Authentic Guatemalan Tamales – Bohemian Bowmans.” Bohemian Bowmans. N.p., 2016. Web. 16 Nov. 2016.

Banana Leafs. Digital image. Fresh Produce. N.p., n.d. Web. 7 Dec. 2016.

Buiatti, M., P. Christou, and G. Pastore. “The Application of GMOs in Agriculture and in Food Production for a Better Nutrition: Two Different Scientific Points of View.” Genes & Nutrition 8.3 (2013): 255–270. PMC. Web. 16 Nov. 2016.

“Creation Story of the Maya.” Welcome to Living Maya Time. N.p., n.d. Web. 16 Nov. 2016.

G., Victor, Jasmine G., Sandra B., Yessy M., and Jason M. “Guatemala Bakery – Harbor City – Harbor City, CA.” Yelp. N.p., 2012. Web. 16 Nov. 2016.

Girón, Rudy. Guatemalan Tamales. Digital image. Antigua Daily Photo. N.p., 25 Dec. 2006. Web. 7 Dec. 2016.

“Guatemalan Baked Goods … Cubilletes, Pirujos, Etc? – Chowhound.” N.p., n.d. Web. 16 Nov. 2016.

“Guatemalan Tamales for Christmas: Colorado, Negro & Chuchito.” AntiguaDailyPhoto.Com. N.p., 2016. Web. 16 Nov. 2016.

Hoyer, Daniel. Tamales. First ed. Salt Lake City: Gibbs Smith, 2008. Print.

“Maya Agriculture.” Maya Agriculture. N.p., n.d. Web. 16 Nov. 2016.

Marla. Tamale Sauce. Digital image. Epicurean Travel. N.p., 2 Mar. 2014. Web. 7 Dec. 2016.

“Tamale.” Merriam-Webster.com. Merriam-Webster, n.d. Web. 16 Nov. 2016.

Teosinte. Digital image. The Dirt Brothers. N.p., July-Aug. 1997. Web. 7 Dec. 2016.

@themixedculture. “The Importance of Corn in Guatemala.” The Mixed Culture. N.p., 2014. Web. 16 Nov. 2016.

Thyberg, David. “Traditional Food of Guatemala.” USA Today. Gannett, n.d. Web. 16 Nov. 2016.

Veronda, Ken. Guatemalan Spices. Digital image. Revue Guatemala’s English Language Magazine. N.p., 14 Dec. 2011. Web. 7 Dec. 2016.

Weiser, Tammy Ganeles. “Guatemalan Tamales with Chicken | The Weiser Kitchen.” The Weiser Kitchen. N.p., n.d. Web. 16 Nov. 2016.

Gumbo

Gumbo, a stew or soup usually made with chicken or seafood, with a thick gravy often called roux (pronounced roo).  This stew gets its name from the Bantu language okra (ki kombo) or the Choctaw word for file (kombo).  This is just one version of how gumbo came about.

Gumbo is a food eaten in many parts of the United States, more so in the south.  Gumbo is a food that people of poor background created.  Many years ago a woman once told me that gumbo has been around for a very long time and was actually made of the food in the area that they could find.  On the contrary folks now a days swear that gumbo is very expensive to make, however, I believe if that is what you like you make it, you eat it and you enjoy it.  Yes, gumbo can be very costly, but in Louisiana way back then the seafood was nearby and plentiful, therefore, it was a poor man’s paradise.

In Louisiana folks eat gumbo on special occasions such as Thanksgiving, Christmas and birthdays.  Gumbo is fun to eat and is always a conversational gathering.  Gumbo makes conversation, jokes and of course happy faces.

In the state of Louisiana gumbo is well known and eaten often all over these parts.  Although folks all over the United States consume this delicious food it is highly recognized in the southern parts of the United States mainly Louisiana.   Gumbo has been around for a very long time “Dr. Carl A. Brasseaux, of the University of Louisiana at Lafayette, who has written the definitive history of the Cajuns, found that the first documented references appeared around the turn of the 19th century.” (Dry)  Gumbo has been around so long it is to Louisiana as apple pie is to the United States.

A major question is “Where did gumbo come from?”  Well as you know several people will tell you several different things, however, gumbo is a dish that was actually influenced by the French and Spanish settlers, African slaves who gave it the name from the Bantu, gombo for okra, and the Native Americans that lived in the bayous of Louisiana and the Mississippi Delta.

Gumbo usually comes from and is known by two groups of people, one being Cajun folks that are considered to be Acadians from Canada, and the other being Creoles.  The name Creoles meaning a mixture of people, for example, French and Spanish, French and Native Americans or French and Black Americans.

When there are a variety of people in the melting pot you also have variations of ways to prepare gumbo in the melting pot as well.

Gumbo is a dish that is prepared and eaten in many parts of the United States.  Gumbo is eaten often in southern states and more so in Louisiana.  However on the contrary in other parts of the country gumbo is usually eaten on holidays such as Thanksgiving, Christmas, New Years and special occasions.

When it comes to gumbo there are several types, however, chicken and sausage, and seafood are the most popular.  With these two gumbos being the most popular this is where the Cajun and the Creole styles come in.  You will definitely get a disagreement on what make a gumbo.  If you find yourself in New Orleans, which is a Creole, not a Cajun, town, you’ll find some cross mixture of elements.  Suffice it to say that Cajun gumbos are usually thicker, spicier, and hotter.  Creoles like to think of their gumbos as more refined.” (Burns)

This dish has lots of history; it has been eaten for roughly 200 years, maybe in 200 different ways.  Gumbo is made from the immediate wildlife that was readily available, such as seafood, wild animals and fresh vegetables.  “By the time the Louisiana Territory was purchased from the French in 1803, international trade and forces had converged in the region, and many hands were stirring the gumbo pots.  Creole cooks nursed the dish, and French Acadian (Cajun) influences provided the roux, a classic touch for thickening gravy and sauces.  Hot peppers from the Caribbean and later from New Iberia, Louisiana added heat to the dish.” (Berry)

“|Another local ingredient, dried sassafras leaves, now referred to as gumbo filé, was borrowed from Native Americans and used as a thickener replacing okra.” (Berry)  Here in both Cajun and Creole cooking okra and file (just ground sassafras leaves) is considered to be a main ingredient in gumbo.  “In this neck of the woods if you don’t use both okra and filé in gumbo, people don’t like.” (White)  So with all that being said, “Let’s make some gumbo!”  The following are two recipes one is from a magazine titled Southern Living the other being my very own.

Recipes

Southern Living

Makes 4 to 6 servings


Ingredients

1-pound Andouille sausage, cut into 1/4-inch-thick slices

4 skinned bone-in chicken breasts

Vegetable oil

3/4-cup all-purpose flour

1 medium onion, chopped

1/2 green bell pepper, chopped

2 celery ribs, sliced

2 quarts hot water

3 garlic cloves, minced

2 bay leaves

1 tablespoon Worcestershire sauce

2 teaspoons Creole seasoning

1/2 teaspoon dried thyme

1/2 to 1 teaspoon hot sauce

4 green onions, sliced

Filé powder (optional)

Hot cooked rice

Garnish: chopped green onions

Preparation

Prep: 55 Minutes

Cook: 3 Hours

Cook sausage in a Dutch oven over medium heat, stirring constantly, 5 minutes or until browned. Drain on paper towels, reserving drippings in Dutch oven. Set sausage aside.  Cook chicken in reserved drippings in Dutch oven over medium heat 5 minutes or until browned. Remove to paper towels, reserving drippings in Dutch oven. Set chicken aside.

Add enough oil to drippings in Dutch oven to measure 1/2 cup. Add flour, and cook over medium heat, stirring constantly, 20 to 25 minutes, or until roux is chocolate colored.

Stir in onion, bell pepper, and celery; cook, stirring often, 8 minutes or until tender. Gradually add 2 quarts hot water, and bring mixture to a boil; add chicken, garlic, and next 5 ingredients. Reduce heat to low, and simmer, stirring occasionally, 1 hour. Remove chicken; let cool.

Add sausage to gumbo; cook 30 minutes. Stir in green onions; cook for 30 more minutes.

Bone chicken, and cut meat into strips; return chicken to gumbo, and simmer 5 minutes. Remove and discard bay leaves.

Remove gumbo from heat. Sprinkle with filé powder, if desired. Serve over hot cooked rice. Garnish, if desired.

Now my own gumbo really doesn’t have a recipe, I just start throwing things in and create it as I go.  You must keep in mind though that gumbo is to be cooked with lots of love, however, I will do my best to make you a good recipe.  Just don’t forget to prepare this dish with love from the heart.

My Own Gumbo

Ingredients

3-pounds shrimp (medium)

2-3-pounds crab legs (separated at shoulders)

2-pounds Andouille sausage cut ¼ inch thick

1-cup vegetable oil

1¼-cup all-purpose flour

2 finely chopped onions

1 whole onion

6 celery stalks finely chopped

2 bell peppers finely chopped

1 bell pepper for stock

4 cloves of garlic finely chopped or slice

2 teaspoons of filé

2 teaspoons of paprika

Salt and black or white pepper to taste

1½ teaspoon of cayenne pepper

10-cups water


Preparation

Shell and devein shrimp, keep shells for stock.  Put shrimp shells, 1 cut onion and 1 cut bell pepper in 6-cups of water and boil for approximately 10 minutes.  After boiling is complete drain keeping the stock.  While preparing stock you fry the chicken, (no need to salt or flour the chicken) just fry to golden or dark brown.  Fry sausage.  Set stock, fried chicken and sausage aside.  In 10-12 inch skillet (preferably cast iron) heat vegetable oil at medium high then add flour with wooden spoon stir (remembering this is a timely process) constantly stirring avoiding burning flour.  Once you have reached a medium to dark color you can start adding the stock in small batches at a time, stirring constantly (still drinking beer) what the heck pour some beer in with the stock.  Once you have reached the desired color for your roux approximately 30-45 minutes total time you can transfer all ingredients (excluding the shrimp) into the 10-quart pot.  Bring to a boil and simmer low for 1½ – 2 hours, skimming the fat as it may occur.  Now keep in mind this is a southern mixture “and we don’t use no recipe.”  While cooking gradually add remaining stock and water to your liking.  Once you are satisfied with your gumbo you put in the shrimp and cook/simmer for an additional 10-15 minutes.  Now your creation is complete.  Serve over white rice.  You may garnish with fresh chives. Some like corn bread, however, I prefer saltines.  Note: once you have tasted your gumbo take some filé and sprinkle over lightly and experience the difference.


Works Cited

Berry, Jason. “Urban Gumbo.” New York Times Book Review 113.7 (2008): 23.  Readers’

            Guide Full Text Mega (H.W. Wilson). Web. 29 Nov. 2016.


Bhabha, Leah. “The History of Gumbo”. Food52 4 Apr 2014. Web. 11 Dec. 2016.

https://food52.com/blog/10105-the-history-of-gumbo


Brassieur, C. Ray. “Mardi Gras, Gumbo, An Zydeco: Readings In Louisiana Culture.” Louisiana

History 46.1 (2005): 97-99. America: History & Life. Web. 29 Nov. 2016


Burns, K. “Food For Culture.” Essence (Essence) 22.11 (1992): 50. Academic Search Premier.

            Web. 29 Nov. 2016.


Dry, Stanley, “Roux The Day.” Louisiana Life 30.1 (2010): 22-24. Readers’ Guide Full Text        

            Mega (H.W. Wilson). Web. 29 Nov. 2016.


Hearne, Betsy. “The Secret Of Gumbo Grove (Book review).” Bulletin Of The Center For

            Children’s Books 40. (1987): 199. OmniFile Full Text Mega (H.W. Wilson). Web. 29

Nov. 2016.


Mariani, John, and Gail Bellamy. “Gumbo.” Restaurant Hospitality 82.9 (1998): 80. Business

            Source Premier. Web. 29 Nov. 2016


Moss, Robert. “The Real Story of Gumbo, Okra, and Filé.” Serious Eats Sep 2014. Web. 11 Dec.

  1. http://www.seriouseats.com/2014/09/history-new-orleans-gumbo-okra-file- powder.html


McCulla, Theresa. “Fava Beans and Bahn Mi: Ethnic Revival and The New New Orleans   Gumbo.” Quaderni Storici 151.1 (2016). 71-102. America: History & Life.  Web. 29 Nov. 2016.


Southern Living. My Recipes. Web. 10 Dec. 2016. http://www.myrecipes.com/m/recipe/chicken-   and-sausage-gumbo-0


Welsch, Roger L. “Food Chain.” Natural History v104 p62 Aug 1995. Web. 5 Dec. 2016.


White, Joyce. “A Bowl of Black History: Gumbo, Part I.” New York Amsterdam News 27 Jan.

2005:24+. Academic Search Premier. Web. 29 Nov. 2016.


Wright, Jodi. “Cajun Flush”. Indianapolis Monthly 26 no 1 298, 300-1 S 2002. Web. 5 Dec.                      2016.  http://www.indianapolismonthly.com/

Cookbook Final – Canning Applesauce

Applesauce – A Small Labor of Loveimg_7247

Since we live in an era of instant meals, fast, sugary and over-processed foods, it is good to know that we can walk into any market, and sometimes even food carts or small vendors, and we can always find an apple. Supplied 365 days a year from any of our 50 states that grow the some 2500 different varieties, apples are the third largest fruit crop grown in this country. During the summer months when apples are still growing, we turn to our southern hemisphere neighbors to sell their precious supply of apples to our nation. Honestly, it would be very strange to walk into the produce section of a store and not find a single apple. For even the most basic of markets and stands carry about 2-3 different kinds of apples. The red variety, for those that love the sweet, and the green variety, for those that love a little bit of tartness, and the yellow for a little bit of both. It is amazing how tens of thousands of years have passed since the first apples grew on the mountains of Kazakhstan, that we still cherish this fruit today, eating it plainly whole or sliced, pressing it into a juice or cider, baking it in pies, tarts and muffins, or how I sometimes make it for my family, as applesauce.

As far as I can remember, I have been always been fond of applesauce. Maybe it’s my German heritage that drew me to it. The first recorded recipe, if you will, of applesauce, or apfelmus, happened to be scribed by the Germans. I remember only being able to eat it at home because my parents bought the Costco version of it, which was a jar bigger than me. Yet, when Mott’s came out with the portable cups, I was ecstatic because it meant I could now have one anywhere and anytime! When I was younger, like most kids, I really didn’t care what was in my food, as long as it tasted good. Now that I am much older and have children of my own, I now know to read labels, look for anything relating to “artificial”, “flavorings”, “monosodium glutamate”, and anything else that seems odd or unpronounceable. Even more so I question those same applesauce cups, because I know there is something preserving that applesauce in those little plastic cups. So, I decided a few years back to make my own, and that would be the only way to know exactly what my kids were eating.

The first time I made it was right after a trip to Oak Glen, California, which apples are at the heart of their community. I met a wonderful lady named “Mom” who owned with her family Mom’s Country Orchard. I learned three things that wonderful day. One, it’s important to use many types of apples to get a perfectly rich flavor. Two, making applesauce is easy, and canning it is best because it can last for months and years. Three, if I wanted to grow a tree myself (and I did), the best method was to graft and grow apples on one existing tree. As soon as I got home, I got to work.

Bringing back a half bushel of mixed apples, I went online to find the applesauce recipe and an easy to read method on canning. Finding more than I would ever wantimg_7219 to k

now about canning at the local library, and learning about the history of Ball, Kerr, and Mason jars, I promptly ordered the Kerr jars (they were the least expensive), and the canning supplies. A few days later I washed about 100 apples, cleaned and sterilized all the equipment and started making my applesauce.
I wanted the applesauce to be as organic as possible, so even though some of the recipes I found added butter (weird), brown sugar (more sweet?), or maple syrup (gluttonous!), I decided to leave all of those out and see how it tasted by itself. It took about two hours to peel, core and slice all the apples, and about a cup of lemon juice so the apples wouldn’t turn gross shades of brown on me. I then threw them all in pots on the stove with organic apple cider as the base liquid. I had thought of water, but in the event I screwed something up, I didn’t want to find a watered and drowned apple sauce.

Since canning was new to me, I was a little OCD, and had the jars warming in the oven, and the lids sitting in pots of hot water. To be honest, I have a small kitchen and so it looked like every square inch was a keeper of a pot of something, a bowl of something, or a sink full of something. It’s amazing how much space canning applesauce takes up, so if you are going to try this, make sure you have a good table nearby, empty and clean counters, and lots of bowls and pots to use. Also, I suggest having a few towels, lying around anywhere and everywhere if you need to grab it for cleaning oneself from the mess made during applesauce creation, and possibly to swat your significant other in the rump for sneaking a taste of your untainted and beloved applesauce. When I first made the applesauce, it was over a decade ago, so I didn’t have the original recipe anymore. This last time, when making it with my daughter, I ended up using the recipe below, courtesy of Ree Drummond, otherwise known as The Pioneer Woman, since she explains not only how to make it, but with the least amount of extras in it. I followed her recipe, keeping it simple to just three things that I’ve only ever used in my applesauce: apples, apple cider (for the base) and Pumpkin Pie Spice. That’s it.

For Ree’s recipe, I recommend starting the process based on her instructions of quantity. When I started my first attempt many years ago, I probably believed that since giving birth, I would also be invincible in the kitchen and canning applesauce would be a walk in the park. Additionally, Mom and her adorable fruit stand probably weighed in on my abilities and the simplicity of making applesauce so that yes, I was totally insane to take on the project I did. That said, the recipe for applesauce below is manageable, not very expensive, and you won’t need to remodel your kitchen to accommodate the growing jar population spilling out into another room. This one is easy and I even made notes in italics where I thought her information was lacking details or like all published cooks, she forgot most of us are novices. Make sure you read this entire recipe and the canning information to its completion before you even set foot in a store, farmers stand, or have your plan of attack for your neighbor’s apple tree. The recipe below is simple to follow, but your jars must be ready to go before you plan on canning them. If you don’t want to tackle canning, no judgement. It takes less than an hour to make the applesauce, but it will be about 2-3 hours more with canning. In any case, read on and good luck!

Homemade Applesauce:
Prep Time: 15 Minutes (30 minutes or more for us non-pros)
Cook Time: 25 Minutes
Difficulty: Easy

Ingredients:
• 6 Lbs – Mixed Variety of Apples
• 1 Cup Apple Juice or Cider
• Lemon Juice
• 1 tsp Cinnamon (as an alternative and with less measuring, I used Pumpkin Pie Spice)
• ½ Cup Brown Sugar, Packed (I omitted this)
• Optional Ingredients: Nutmeg, Maple Syrup, Allspice, Butter (I omitted all of these)

Instructions:
1. Peel, Core, Cut Apples into 8 slices (she’s using a tool that cuts and cores, if you don’t have it, don’t worry, just cut them into slices and the smaller the slices the quicker it cooks)img_7237
2. Combine all ingredients in a large pot and cook over medium heat, stir occasionally, for 25 minutes (approximately. The apples are done cooking when you can easily mash or cut them with pressure from a spoon.)

Now, here is where Ree and I part ways. She likes her applesauce more like smooth baby food and I like mine with chunks of apples in it. Anyway, here are two options on how to proceed:

3. If you are looking for a baby food version: Carefully puree, after it has cooled, in a food processor or blender.
OR
4. If you arimg_7258e looking for chunky goodness: While still in the pot, use a potato masher or a fork to mash up chunks of apples. Be as aggressive or sleight of hand as you like, it’s YOUR applesauce.

Now that your delicious applesauce looks like the inside of a hot and bubbly apple pie, get your jars ready, cause it’s time for a bath! A “canning bath” that is.

This preparation method came from Mama’s Homestead.

Preparing the jars:
1. First, examine your jars for any defects, nicks, cracks, unevenness, etc. This is an important step, any flaws in your canning jars may cause failure in the canning process.
2. If no flaws are are present, wash your jars (old or new) in hot, soapy water and rinse thoroughly, or run them through the dishwasher.
Tip: Do not use anything abrasive on your jars as this may damage the glass.
3. Before filling your jars, they need to be heated (for 10 minutes), so they don’t break during processing. Place jars in a pan with enough water to cover the tops of them. Bring the water to a simmer (180 degrees) on your stove top, keep jars in the simmering water until they are ready to be used. Remove the jars from the simmering water, one at a time, as you are ready to fill them.

Preparing the lids and bands:
1. Inspect them for defects and damage. If the lids are bent anywhere, they will not seal properly.
2. Wash lids and bands in hot, soapy water, then rinse in hot water. Dry Bands. Set lids aside to be heated.
3. Before using your lids, they must be heated for 10 minutes. This helps the lids to seal properly. Place lids in a sauce pan, and fill with water to cover. Heat water to 180 degrees (do not boil). Keep the lids heated until you are ready to use them.

Alright, now I know you listened to me about getting the jars ready before you sliced that first apple. Make sure that your jars and lids are warmed up and ready. Here are the final steps.

Preserving your delicious applesauce:
1. Make sure your large pot has water simmering in it.
2. Place your heated jars next to your workstation and start filling the jars with your applesauce using the funnel about a half inch below the rim.
img_72613. After you fill them, use a rubber spatula along the insides of each jar to remove air bubbles.
4. Wipe the tops of the jars off so the lid will create a good seal. Place the lid on top of the jar (centered), then place the ring over it, and tighten it firmly.
5. When you have a batch of jars ready, use the tongs to place them into the pot of simmering water.
6. Turn up the heat and boil the water for 20 minutes.
7. Remove the jars from the pot and after they cool, you’ll hear them pop. Don’t be alarmed, it means you have a nice vacuum seal.
8. If you have more to can, continue repeating the process until you are out of applesauce. Remember to fill the jars up. If you don’t have enough to fill the last jar, treat yourself to some sampling of the good stuff.
9. After they are completely cooled, you can test the lids once more. I took the rings off and pushed a little on the lid, if it sticks shut, you are now an applesauce canning pro!

Though this not a difficult process and for some may seem arduous compared to buying a jar of applesauce from Trader Joe’s, at the end of the day, I wanted to make sure my kids had something good in their bodies. I wanted to begin a tradition of making somethiimg_7260
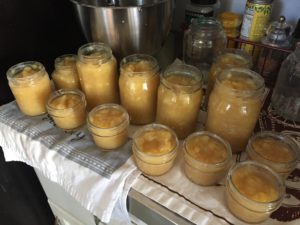
ng from scratch with my kids, of learning how to preserve healthy foods, and to show my daughter (because she is old enough) to appreciate the conveniences we have today – that things weren’t always as easy as picking up something off the shelf. I enjoyed this bonding time with my daughter and I know we will make more yummy foods together. It’s how traditions begin, right?

References

“9 Strange Facts about the History of Apples.” History Extra. N.p., n.d. Web. 03 Dec. 2016.

“A Brief History of Common Home Canning Jars.” History of the Home Canning Jar and Collecting Mason, Ball and Kerr Jars. N.p., n.d. Web. 28 Nov. 2016.

“Canning Confusion: History of Canning Jars – Prim Mart.” Prim Mart. N.p., 12 June 2015. Web. 27 Nov. 2016.

Drummond, Ree. “Homemade Applesauce.” The Pioneer Woman. N.p., 16 Oct. 2013. Web. 28 Nov. 2016.

“History and Legends of Apples, What’s Cooking America.” What’s Cooking America. N.p., 2016. Web. 27 Nov. 2016.

Jensen, Scott. “A Brief History of Applesauce.” InfoBarrel. N.p., 12 Apr. 2012. Web. 27 Nov. 2016.

“Moms Country Orchards – Oak Glen, Ca.” Moms Country Orchards. N.p., n.d. Web. 28 Nov. 2016.

“Preparing Jars and Lids for Canning – Mama’s Homestead.” Mama’s Homestead. N.p., 16 Dec. 2014. Web. 28 Nov. 2016.

Sharp, Tim. “Apples: Health Benefits, Risks & Nutrition Facts.” LiveScience. Purch, n.d. Web. 28 Nov. 2016.

Synan, Mariel. “All About Apples.” History.com. A&E Television Networks, 13 Sept. 2013. Web. 27 Nov. 2016.

French Toast – Final

French toast has significance importance in my life, as it was something that my mom made us after a hard day of work. At a young age, my parents divorced. I lived mostly with my mom in an apartment in Montebello and saw my dad on the weekends, who lived in an apartment in Whittier. Growing up, I loved my parents, and like any kid, wished my parents would get back together. I went to catholic school in East Los Angeles (Our Lady of Lourdes), where my brother and I had a babysitter who watched us while my mom worked. My mom was a great cook and made many different types of food, but our favorite comfort food would have to be her french toast topped with Welch’s grape jelly. My mom, being a young single mother, had my brother and me to feed and this was something that she could do cheaply and quickly. We always had Wonder bread, eggs and grape jelly on hand and my mom could whip this up into delicious french toast in no time. I grew up on Welch’s grape jelly and Wonder bread using it for toast, peanut butter and jelly and of course French toast.

welchs-jellywonder-bread

My Mom’s french toast recipe – 8 slices of wonder bread, 3 eggs, a little milk, oil and a jar of Welch’s jelly. Soak the bread in the slightly beaten eggs with milk and put in the cast iron frying pan with oil. Turn the bread to cook until golden brown and serve with butter and grape jelly.

The history behind french toast is that it was created by “medieval European cooks who needed to use every bit of food they could find to feed their families. They knew old, stale bread (French term ‘pain perdu’ literally means ‘lost bread’) could be revived when moistened and heated. Cooks would have added eggs for additional moisture and protein. Medieval recipes for “French” also suggest this meal was enjoyed by the wealthy. These recipes used white bread (the very finest, most expensive bread available at the time) with the crusts cut off, something a poor, hungry person would be unlikely to do.”

Welch’s “began over 140 years ago, when Thomas Bramwell Welch decided to serve grape juice instead of wine at his church. Welch’s was the first to pasteurize bottled fruit juice using Concord grapes, paving the way for a future industry. After its debut at the Chicago World’s Fair in 1893, Welch’s Grape Juice went on to become the national family favorite it is today. At the heart of Welch’s are about 1,000 family farmers who make everything possible. Each and every farmer is a grape growing expert, who takes great pride in the vineyards they’ve cultivated for generations. It’s our farmer’s dedication to growing the best Concord and Niagara grapes that’s allowed us to provide families with the delicious juices, jams and jellies they’ve loved for years.”

“Wonder bread’s history started in 1921, when Indianapolis consumers were teased that “Wonder” was coming on May 21st. What arrived on that historic day was Wonder Bread—a product that would stir the nation’s imagination like no other and that, nearly a century later, continues to do so today. With a name inspired by the “wonder” of the International Balloon Race at the Indianapolis Speedway and iconic balloon-shaped imagery to match, Wonder Bread soon became a common sight in kitchens across America.  Everyone’s favorite white bread really took off in the 1930s when pre-sliced bread became all the rage. Today, Wonder Bread is still enjoyed by millions of Americans across the nation, where it’s packed in lunchboxes, served in restaurants and craved by those young and old.”

On the weekends when we spent time with my dad, if he wasn’t cooking us up breakfast, which for him consisted of either chorizo and eggs, tamales, menudo, donuts, pan dulce, then we would go to the local diner Norms, The Grinder or Bob’s Big Boy. If we had the chance to eat out, I always went for the french toast or pig’s in a blanket. Restaurant french toast never disappointed, the thick bread, dusted in powder sugar with whipped butter on top and warm maple syrup, yes please. It wasn’t so much that the french toast was the best, but it was the time we spent with our dad that made it special.

My Mom’s french Toast has evolved throughout the years as we moved from Montebello to a beach house in Belmont Shore and it still happens to be one of my favorites. Instead of using wonder bread and grape jelly, we moved up to King’s Hawaiian bread and Mrs. Butterworth’s syrup. This is by far the best french toast I’ve ever had and I never knew about the King’s Hawaiian restaurant. The way my mom prepared it and served it up was always something that we looked forward to.

kings-hawaiian-breadmrs-buttersworths

My Mom’s french toast recipe – King’s Hawaiian round bread, 4 eggs, milk, splash of vanilla and a dash of cinnamon, real butter, oil and Mrs. Butterworth’s syrup. Mix together slightly beaten eggs with milk, vanilla and cinnamon. Slice the round bread into 1 inch thick pieces and soak in egg mixture. Heat cast iron frying pan with oil until hot and fry soaked bread pieces until golden brown on each side. Top with sliced butter and warm syrup. Bon appetite.

“Our mouthwatering tale begins in the 1950’s in Hilo, Hawaii. There Robert R. Taira, the Hawaiian-born son of Japanese immigrants opened his first bakeshop, Robert’s Bakery, after graduating top of his baking class. The first round, soft loaves of Original Recipe King’s Hawaiian Sweet Bread were made here. The loaves rarely ever made it home before being devoured, and a local traditional island favorite was born. (Or should we say baked?) After nearly a decade of growing popularity, in 1963 the much-loved original shop expanded and moved to King Street in Honolulu, where it was renamed King’s Bakery. It didn’t take long for the new location to become a beloved institution as locals lined up around the block for Robert’s famous breads and cakes which were prepared and served with Aloha Spirit, an expression of caring and sharing that is an essential part of island culture.”

kings-hawaiian-french-toast-pic-by-rockin-mama

Credit for image given to rockinmama.nett

King Hawaiian’s French Toast  –  Ingredients; 4 Large eggs, 1/2 cup Milk, 1/2 teaspoon Vanilla, 1/4 teaspoon Cinnamon, 1 tablespoon Butter or oil for frying and KING’S HAWAIIAN Original Hawaiian Sweet Round Bread. Preparation; Step 1 Slice bread crosswise so that each slice is about 1-inch thick. Cut larger slices into halves or thirds, if desired. Set aside. Step 2 In a shallow mixing bowl, whisk together the eggs, milk, vanilla and cinnamon. Mix occasionally to ensure its well-blended. Step 3 Quickly dip slices (do not soak) in egg mixture and cook in frying pan until golden brown on both sides. Step 4 Sprinkle with powdered sugar and serve with warm coconut or maple syrup.

Throughout my childhood, I have always loved french toast and it has been a source of comfort food to me in my life. Whether I’m making it for myself or ordering it at a restaurant, I’m always excited for that first bite. Thick pieces of bread covered in powdered sugar topped with whipped butter and a side of warm syrup or “pain par due,” which is stuffed french toast with an orange marmalade cream cheese filling, topped with powdered sugar, served with warm syrup, Mimi’s Cafe. Who knew bread soaked in egg could taste this good and give meaning to stale bread, besides just being used as croutons in salads or in making stuffing.

pain-perdu-pic-by-mmm-yoso

Credit image given to mmm-yoso.typepad.com

“French toast, which in France is known as ‘Pain Perdu’ (lost bread), is prepared using thin slices of baguettes. Its entire story begins and ends with putting a slice of bread into beaten egg and milk and then cooked in the frying pan. The only difference of its preparation might be in the quantity of the ingredients used to add the flavor for the bread you want. In Germany, the french toast is known as “armer ritter”. This term means “the poor knight”. The same process is being used in preparing the armer ritter. The bread is immersed in the milk and eggs and then fried in the pan. In Portugal, the french toast is served on Christmas Eve and is known as “rabanadas” which literally means “bread golden slices”. It is prepared in the same way as a traditional french toast. After being fried in the pan the Portuguese usually add honey to the bread which looks like golden bread. In Great Britain, there exists another version of french toast cooking. This magnificent piece of bread is soaked in the milk and beaten eggs. After frying it in the pan, it is served with tomatoes and cheese. This savory bread is known as “the eggy bread”. The french toast became popular in North America after the colonization of France by the United States of America and Canada.”

Being a mom myself it’s funny that my kids don’t share the same affection for french toast that I have. I’ve cooked french toast at home the way my mom made it and they are not a fan. They like grape jelly on their peanut butter sandwiches only and that’s just two of my kids.  French toast from King’s Hawaiian or pain par due from Mimi’s Café is also only liked by two of them and not the same two. My younger one’s only like french toast sticks from Carl’s Jr, I don’t know where I went wrong with those two. I guess being on the go in the mornings Carl’s Jr was the closest thing to having french toast as I could get. Carl’s Jr by my house knows me well and they always oblige in the evening time when my kids have a fix for french toast. Now you can even buy Krusteaz frozen french toast which is a staple in my house, go figure.

carls-jrkrusteaz


Today you can get french toast almost anywhere and  24 hours a day at any restaurant or you can make it at home. There is such a variety out there depending on your taste buds. You can get them topped with fruit, stuffed with cream cheese or chocolate and made with different kinds of breads. There are so many different flavored syrups, sauces, butters or just good old C&H powdered sugar. No matter where I eat, french toast is always with me, along with the nostalgia of eating my mother’s french toast. Whether it be from Wonder bread and Welch’s grape jelly or the King’s Hawaiian round bread with Mrs. Butterworth’s syrup, to me this is the best comfort food, because it was made by mom with love.

Works Cited

“A Short History.” City of Whittier – About Our City. N.p., n.d. Web. 28 Nov. 2016.

Bakery, King’s Hawaiian. “About Us | King’s Hawaiian Bakery.” King’s Hawaiian Bakery. N.p., n.d. Web. 28 Nov. 2016.

“Carl’s Jr.” Wikipedia. Wikimedia Foundation, n.d. Web. 28 Nov. 2016.

“City of Montebello – History.” City of Montebello – History. N.p., n.d. Web. 28 Nov. 2016.

“History.” Belmont Shore Business Association. N.p., 20 Jan. 2015. Web. 28 Nov. 2016.

“History of French Toast as a Classic Meal of French Cuisine.” French Toast Recipes. Cook With Pleasure. N.p., n.d. Web. 28 Nov. 2016.

“A History of Wonder.” Wonderbreadcom Our Story Comments. N.p., n.d. Web. 28 Nov. 2016.

Kimmie. “The Origin of the French Toast.” ChefTalk.com. N.p., 21 Aug. 2002. Web. 28 Nov. 2016.

Krusteaz. “Krusteaz.com | Our History.” Krusteaz. N.p., n.d. Web. 28 Nov. 2016.

“Mimi’s Cafe | Our Story | Things Are Changing at Mimi’s Cafe and They’re More Delicious than Ever.” Mimi’s Cafe. N.p., n.d. Web. 28 Nov. 2016.

“Who We Are.” Who We Are. N.p., n.d. Web. 28 Nov. 2016.

Stuffed Deviled Eggs-Final

eggs-bacon-bits-images

Eggs go a ways back in my family, and are considered nostalgia food for me.  As a child, I remember eggs were always available in our household. When I look back, eggs were symbolic in that we didn’t have meat at times, so my mother used eggs as a protein substitute. Little did I know that eggs had so much protein?  For example, eggs have 60% of protein in the white part of the egg, and my mother was very particular about making sure we got a balanced diet. It was either eggs or government peanut butter which was served on a regular basis; however eggs became the staple food in our kitchen. There were nine siblings in our home, so my mother became very creative when cooking food. She learned how to stretch what we had available and used eggs whenever there was not much else to eat. For instance, my mother would cook a big pot of grits, and serve them with eggs on top. She also prepared scrambled eggs and occasional bacon served with toast. Sometimes we were given plain eggs without any sides because it was all we had. Deviled eggs were a delicacy, and were served only on major holidays like Thanksgiving and Christmas. On occasions my mother would allow my siblings and I to boil a few eggs for Easter, but most of the Easter eggs we enjoyed eating were from the local Sunday School Easter egg hunt.

egg-omelette         Eggs connect to my childhood in other way too. First, when I was in kindergarten, my mother used to send me on school field trips with an egg sandwich for lunch. Needless to say I was embarrassed because other classmates had bologna, and other lunch meats we could rarely afford.  Secondly, high school was when I learned to appreciate eggs. I began to cook my own egg and cheese sandwiches for breakfast before walking to school in the morning. For example,  my daily routine was to prepare two scrambled eggs with a little butter and a dash of salt and pepper. The eggs were placed between two pieces of “wonder bread” with a slice of government cheese. The energy I received from eating the egg sandwich always sustained me until lunch was served at school. Now that I am older, I keep eggs in my refrigerator the same way my mother used to. egg-sandwich-images

Traditionally, I use eggs for breakfast, and find myself eating egg and cheese sandwiches occasionally. Ironically I despise Bologna as adult. I also make deviled eggs as a treat during the holidays for the entire family, and often switch up the stuffing using bacon bits for added flavor. Carrying on the legacy of my mother, I am reminded of her during the holidays especially when cooking deviled eggs.  Eggs are also eaten for dinner in our home whenever other proteins are running out, and we are in the mood for something lighter.

Eggs Background

According to East Indian history, wild fowl were domesticated in 3200 B.C. For the Egyptians and Chinese the records show fowl were laying eggs as earliest as 1400 B.C. and 600 B.C. When eggs finally arrived in America, there were over 200 different breeds of chickens. Hens that lay eggs in the U.S. are usually the Single-Comb White Leghorns, and during the 1900-1920’s, people produced eggs mostly in their backyards, and gave them to other family members. Any extra eggs were sold to the local farmer’s markets. For example, in the south my grandmother’s backyard had at least a dozen hens and a couple of roosters. My grandmother would feed the hens’ grain and feed on a regular basis, and every few days, she would fill up old egg cartons with newly hatched brown eggs. She would then share the eggs with my uncles and aunts who lived on the farm also.

Hens were laying approximately 150 eggs per year, with a 40% mortality rate (www.incredibleegg.org). By the 1940’s, wire housing was researched, and improved upon in order to house hens. Over the years, caging technology improved allowing hens to product approximately 250 eggs per year.  In the 1950-1960s, improved technology allowed farms to increase output of eggs by using conveyor belts, and to shift to larger commercial operations (www.incredibleegg.org).

In today’s economy, over 300 million laying birds produce 250 to 300 eggs a year each. The total U.S. egg production has grown to over 75 billion eggs a year.

Throughout history, eggs have been symbolically associated to Easter. According to the internet article titled, Eggs are Symbolic”, during ancient times eggs were associated with rebirth, fertility, and the perpetuation of the cycle of life (http://www.mamalisa.com/blog/the-symbolism-of-the-egg). For example, spring is a time when flowers blossom, plants grow, and trees develop new leaves. The symbolism can be seen in that spring time like the egg signifies new birth and life.

eggs-download

Eggs Nutritional Analysis

Eggs are extremely nutritional. For example, eggs are the least expensive protein on the market, and one egg has 6 grams of protein. In addition, the egg yolk itself has high nutrient density and the yoke contains Choline which promotes normal cell activity, liver function and transports nutrients throughout the body.  Egg has70 calories, no carbohydrates and contains no sugar, and what is even more interesting about an egg shell is that there are 7 to 17 thousand tiny pores on the shell surface (www.incredibleegg.org).  Eggs also have all 9 essential amino acids that the body needs, and one large egg has 13 essential vitamins and minerals. They are affordable and are a good source of choline, selenium, Vitamin D, Vitamin B12, phosphorus, and riboflavin (www.eggnutritioncenter.org).  Most of the vitamins and minerals are in the egg yolk itself, so if you discard the yolk which is 40% of vitamins and minerals, what is left is 60% of the eggs protein (www.eggnutritioncenter.org).

It is true that there are a variety of eggs in the supermarket to choose from; however, it is not always clear to the shopper what Cage Free verses Free Range eggs mean. The naming convention for each type of egg correlates to the environment in which hens lay their eggs. First, the conventional egg is laid by hens living in cages with access to feed, water and security. The types of hens that lay conventional eggs are protected from disease and predators.

Secondly, free range eggs are produced by hens that can roam outdoors. Free range eggs are laid by hens that eat grains, wild plants, and insects during foraging (www.incredibleegg.org).

Thirdly, cage free eggs are laid by hens that are kept indoors, but are free to roam in an open area. Cage free hens that lay cage free eggs usually roam inside of a building, a barn or poultry house (www.incredibleegg.org). Fourthly, there is the organic egg. Organic eggs are produced according to the U.S. Department of Agriculture standards for organic foods. Hens that lay organic eggs are fed food rations that were grown with the least amount of conventional pesticides, fungicides, herbicides and fertilizers (www.incredibleegg.org). Finally, the enriched colony eggs are produced in a system that has to contain adequate environmental enriched areas allowing perch space, dust bathing and/or scratch areas. In other words environment enriched areas allow hens to produce by their most natural behavior. In addition, enriched colony hens must be American Humane Certified (www.incredibleegg.org).

 Other Egg facts

egg-rolls-download     Eggs are used for a myriad of dishes, and their purpose in foods has several functions. For example, eggs are used to bind ingredients, to give moisture, and they are used as a leavening agent. For instance, when making pancakes, eggs serve as the binder that keeps the water, eggs and milk glued together, and eggs also gives the pancakes its’ fluff. Same thing hold true for baking a cake. A pound cake requires five whole eggs to help the cake ingredients stick together.

Eggs also have different shell colors. For example, some egg shells are brown, and others are white.  According to internet article entitled, Eggs Facts, shells differ in color because of the breed of the hen. Hens that have white feather and ear lobes are known to lay white eggs, whereas hens with red feathers and ear lobes lay brown egg. The quality in flavor or nutritional value is the same

(http://www.eggs.org.nz/egg-facts/).

Some argue that eggs can be bad for you. The National Institute of Health states high cholesterol is bad your health; therefore, because egg yolk is known to have cholesterol, people who suffer from high LDL levels should avoid eating too many eggs. (https://medlineplus.gov/magazine/issues/summer12/articles/summer12pg6-7.html)

Eggs Political-Economic Analysis

On the economic forum, Willamette farm owner Greg Satrum owns an egg farm in Canby Oregon. He is third generation egg farmer that states he and his family has been raising hens since 1852. The Satrum family started Willamette Farms officially in 1934. Currently, the Willamette Farm houses over 2.2 million laying hens, and produces over 1.8 million eggs per year (www.willametteegg.com). The Willamette Farm also provides fresh shell eggs, hard boiled and liquid eggs which are regularly sold. The Willamette Farm is also a certified kosher dealer.

In the political-economic arena, legislation has recently been passed U.S. laws and policies requiring egg farms to go cage free. Cage free systems are to replace small cages, which is banned in most states. Facilities are expected to comply with new state laws, and some farmers complain that in cage free facilities, more hens die from injury in flying, and having more direct interaction with other hens. In Frankfort Indiana, Rose Acre Farms paid 5,000,000 to purchase a cage free facility to stay in compliance with the law.

            One of my favorite recipes that I enjoy making in remembrance of my mom is stuffed eggs. My mother used to make what she called “Deviled Eggs” every Thanksgiving and Christmas. She never followed a recipe, but had the knack for knowing just the right amount of seasoning to add making the eggs turn out delicious. The basic recipe below is what I use to make deviled eggs. I took this from the internet.

ingredients

Recipe:

6 large eggs

2 spoons of mayonnaise

1 teaspoon mustard

1/8 teaspoon salt

Dash of pepper

Garnish: paprika

Preparation instructions: Boil eggs for approximately 20 minutes. I let eggs cool down for about 30 minutes. Peel eggs, and slice the eggs in half. Remove the yolks and place into to a small bowl; place the egg whites on a serving platter. Mash the egg yolks into crumbs using a fork. Add mayonnaise, yellow mustard, salt, and pepper, and sweet pickle relish. Mix ingredients well. Use a teaspoon to heap a spoonful of mixture into the egg whites, and garnish with paprika on top.

chicken-images
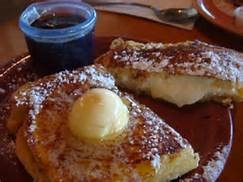
It has been said that much can be learned about a person by the type of eggs they chose to eat. What type of eggs do you like eating? Visit internet site http://www.thekitchn.com/the-egg-personality-test-what-your-egg-choice-says-about-you-200877 to learn you or someone else by how they like their eggs.


Works Cited

Chef in You. “How to find out the purpose of Egg in a recipe” by DK , Jul 25, 2012. Internet Article

http://chefinyou.com/articles/role-of-egg-baking-cooking/

Classic Deviled Eggs Recipe: Food Network

http://www.foodnetwork.com/recipes/classic-deviled-eggs-recipe.html

Egg Nutrition Center, “Credible Science”, Incredible Egg” 2016. Print

www.eggnutritioncenter.org

Glascock, Taylor. Latest Flap on Egg Farms: Whether to Go ‘Cage-Free’: As States Ban   Small Cages,      Customer Demands are weighed against the Higher Costs.”  Wall           Street Journal, Print.

http://www.wsj.com/articles/latest-flap-on-egg-farms-going-whole-hog-on-cage-                   free-1426100062

I Love Eggs-Egg Facts, New Zealand. Internet Article

http://www.eggs.org.nz/egg-facts/

NIH Medline Plus, National Institute of Health, 7.2 (2012): 6-7. Internet Article.  Print.

The Egg Personality Test: What Your Style of Egg Says About You

http://www.thekitchn.com/the-egg-personality-test-what-your-egg-choice-says-                   about-you- 200877

https://medlineplus.gov/magazine/issues/summer12/articles/summer12pg6-7.html

Wake Up to the Incredible Edible Egg, Internet Article. 2016. Print.

www.incredibleegg.org

Willamette Egg Farms, “The Finest Quality Egg”, 2016. Print.

www.willametteegg.com

Yannucci, Lisa. “The Symbolism of the Egg” 23 Feb. 2008.  2016. Print.

http://www.mamalisa.com/blog/the-symbolism-of-the-egg/

Cookbook Final

Dominique Kendrick

IDS 336 Food and Culture

Dr. Perez

29, November 2016


I chose Gumbo as my final presentation because it reminds me of my family. My mother is a beautiful creole-southern woman from Shreveport, Louisiana and this recipe is all about her culture and traditions. My family members from Louisiana began to migrate to California, landing in Oakland, San Diego, Anaheim and Los Angeles. They brought along with them their food, language, and traditions. They never denied their Creole style of living. That was a way to preserve the culture and pass it down to us, children. I am blessed to be one of them, my name is Dominique and this is my gumbo tradition. Every holiday my family and I decide when is the gumbo to be made, Thanksgiving or Christmas. Due to my new class about “Food and Culture”, this Thanksgiving was perfect for me.

“The word Gumbo comes from West Africa, in the Central Bantu dialect word for okra that was brought to colonial times by slaves.” (Vogt, 1) However, we don’t use okra in our gumbo, too slimy for me. There are two familiar gumbos, one made of seafood and the other made with chicken and sausage. “Gumbo is the mixture of many cultures that arrived in southern Louisiana. The cooking styles of the French, Spanish, Indigenous tribes (Choctaw, Alabama, & Cherokee), Africans, Italians and Germans.” (Wikipedia, Gumbo)  All these races lived together in a small area in the 18th and 19th Centuries. They are not to be confused with Cajun people, Cajun people migrated from Arcadia, present day Nova Scotia in 1755. (Vogt, 1) Cajuns settled in the bayous and prairies south and west of New Orleans. “Gumbo was first documented around the 19th century, but the roux goes back as far as 1651. Francois Pierre La Varenne calls it a “thickening of flower”. (Wuerthner, 1) The base for gumbo is the Roux, equal part flour and equal part oil, browned in a cast iron skillet, until you smell nuts. The Holy Trinity is what we call the celery, bell pepper, onion and garlic vegetable mixture that goes into the roux once it’s ready was brought by the Spanish colonists.


On, Friday, November 18, 2016, my mom and I went to Sprouts market in Culver city, for 2lbs of raw, deveined shrimps, onions, celery, green peppers, fresh parsley, and a box of old bay seasoning. I love spending time with my mom, she is my comfort. It also helps that she is a very funny. I asked my mom who taught her how to make gumbo, she replied her Grandmother Rose and Uncle Bey cooked all the time. My youngest daughter was on vacation from school Thanksgiving week so I decided to take that week off work with her. My oldest daughter was only off work that coming Monday and Thursday, which meant Monday was our day together to get the live crabs.

Chinatown

Chinatown

We have been going to China town for our live dungeons crabs since I can remember. I never know the name of the fish market until this project, I only knew where it was. The fish market is called, “HOI YEUNG CO. 716 Broadway Ave. (figure Chinatown)”. We bought 4 live crabs at $7.99 lbs., which came up to $65.00 and a bag of king crab legs

for $74.00. It is very important that you know how fresh your seafood is and how they died.  In Louisiana, seafood was cheap because people lived so close to the bayous and swamps, but in Los Angeles, seafood isn’t cheap, ouch. Yes, you guessed it, we are making seafood gumbo. Gumbo is a hearty seasoned soup or stew with meat and seafood, served over white rice that was able to feed a large amount of people. The seafood gumbo contains shrimp, crabs, andouille sausage, and sometimes oysters. The meat gumbo contains chicken, duck, squirrel, and sometimes rabbit. Our seafood gumbo consists of 3 whole crabs, crab legs, shrimp, beef sausages, skinless, boneless chicken thighs, the holy trinity, and around 16 herbs and spices. We don’t use tomatoes, okra or file seasoning in our gumbo. We are in the 99 percent of creole cooks, who wouldn’t be caught died adding these ingredients in our gumbo. File powder is a Choctaw spice made from dried and grounded sassafras leaves. (Moss, 1) File powder should be added per bowl per individuals’ taste preferences. Shopping for all the ingredients to make gumbo takes about a day or so. We were all tired after shopping so tomorrow would be the day to cook.

I woke up Tuesday morning, put the seasoned chicken thigh in the oven to bake and went to pick up my mother. We stopped at Dulan’s Soul food restaurant, on Century Blvd. to get something to eat while we cooked our gumbo.

Seafood Broth

Seafood Broth

The first step is to have a big pot of water to start the broth. To make seafood broth, we had 3 ½ lbs. of shrimp shells I have saved during the year, three live crabs, 3 bay leaves, 2 lemons, granular chicken bouillon seasoning and a bag of old bay (crab boil figure Seafood Broth). Next I start on the roux, one cup of flour and one cup of vegetable oil, slowly cooked in a cast oven skillet over medium heat. The roux must be stirred constantly so it doesn’t burn.

Holy Trinity and other ingredients

Holy Trinity and other ingredients

You should begin to see the color change from a yellow to tan and then brown, plus you will begin to smell nuts. While the seafood broth is simmering, I began to cut up the holy trinity vegetables (3 onions, 2 green bell peppers, 7 celery stalks, 2 bunches of parsley, 1 bunch of green onions and 3 tablespoons of  chopped garlic) to put in my new food processor, thank god for this miracle machine (see figure Holy Trinity). As my mom and I watch taped TV shows, sip some wine and wipe our eyes from the smell of onion fumes. We laughed at the stories she tells about her childhood back in Louisiana. I remember when my mom used live blue crabs for the broth. They were fast and determined not to get in that hot boiling water. I learned early as a child not to be scared of the most delicious food in the world. I can breakdown a crab with my hand and not cuts.


Back to the cooking, I begin to smell the ocean and the spices released from the crab boil bag, fill my kitchen. Once the shrimp shells and crabs were an orange color, it was time to strain the broth, to remove the pieces of shrimp shells.

Cool crabs

Cool crabs

I removed the hot crabs and let them cool off before I can open them up. Once crabs are cool to touch, I open the crabs to add the juice, yellow liver and orange roes inside the head of the crab into the broth (see figure cool crabs). My mom calls this juice, the butter. I remove the spongy gills and tough bits of cartilages on the crabs’ body to discard and break the crab into pieces. The broth goes back on the stove along with all crab pieces and legs, shredded chicken thighs, chopped sausages, shrimp, Worcestershire sauce, all spices, roux and veggie mixture. After a couple of hours, the broth should resemble the green bayou swamp color. That is how I know if someone can really cook gumbo by the color of the broth and taste. Gumbo is cooked a minimum of three hours and simmers all-day. My mother got tired and called my dad to pick her up, but I have cooked gumbo before so it was in good hands. I occasionally would stir the gumbo and add seasons occurring to my memory taste buds. Once cooled off, I needed to skim the excess oil from the top of the soup, now it is perfect. The gumbo was finally done around 6pm, now I had to put it in storage containers to freeze and distribute to family members. The hot containers took another 3 hours to cool before they could be placed in the refrigerator and freezer. This pot filled up 9 containers of gumbo and 2 containers of broth. My mom has two, my mother in love has one, and I have the rest to share and freeze for later on. This recipe below is a smaller version of the one we made, my mom does not measure ingredients. She says when you know you just know, sorry guys.


This recipe is from a cookbook that all the members in my family have. The American Cooking! Creole and Acadian by Peter S. Feibleman and the Editors of Time-Life Books, published 1971. The recipe is called, “Crab, Shrimp and Okra Gumbo” but we crossed out Okra and wrote in Chicken. Over the years my family has added more and more ingredients and spices to make it our own but you can start here.

Brown Roux

To make about 11 tablespoons

8 tablespoons unsifted all-purpose flour

8 tablespoons vegetable oil

Combine the flour and oil in a heavy 10-inch cast iron skillet. Place the skillet over a low heat and stirring constantly, simmer the roux slowly for 45 minutes to an hour. After 5 minutes the mixture will begin to foam. After about half an hour, the roux will begin to darken and have a faint nutty aroma. Continue to cook the roux until it the color you want tan to dark brown, then add in all your veggie from the holy trinity and stir all together. It should smell like seasoning you would use for dressing or stuffing. This brown roux serves as the base and thickening agent for bisques, gumbo, and other soups, as well as gravies and stews.

20161122_153934

finished product

Gumbo

To serve 4

1 pound uncooked medium-sized shrimp (about 20 to 24)

7 quarts water

1 lemon, cut crosswise into ¼ inch-thick slices

3 bay leaves

1 box of crab boil in the bag

1 ½ teaspoons crumbled, dried thyme

2 tablespoon of chicken seasoning

Any kind of seasonings you like (seasoned salt garlic and onion powder, ground marjoram, lemon pepper, sage, oregano, tarragon, poultry seasoning, and paprika)

1 tablespoon plus 1 teaspoon salt

10 live blue crabs or 3 dungeons crabs or crab legs (snow or king)

8 baked/seasoned chicken thighs (skin on or off) (bone in or out) or baked chicken wings

1 rope of sausage (beef, pork or turkey) sliced

4 tablespoons brown roux

½ cup coarsely chopped onions

1 ½ teaspoons finely chopped garlic

¾ cup coarsely chopped green pepper

½ cup coarsely chopped celery

1 bunch of fresh parsley coarsely chopped

2 stalks of chopped green onions

1 teaspoon ground hot red pepper (cayenne)

½ teaspoon Tabasco sauce

4 to 6 cups freshly cooked long grain white rice


Shell the shrimp, buy them already deveined because that takes skill and practice. Save the shells and wash the shrimp off. In a 10 to 12 quart pot, bring to a boil, add the shrimp shells, lemon slices, seasonings, bay leaves, crab boil bag, and live crabs. When shrimp shells and crabs turn orange, take them out to cool and strain the broth to remove shells and discard bag of seasoning. Place strained broth back on the stove on low heat, stir in the roux –veggie mixture, drop the shrimp into the stock, drop cooked chicken thighs, and crab legs or broken down crabs. To break down whole crabs, shell them in the following way: Grasping the body of the crab, turn it over on its belly, you will see long piece you can pull down. Pull it down and where the shell starts, push your thumb in hold head down and pull up on the body, it should open like an oyster. Inside the head is juices and a yellow liver on both sides. Put that into the broth but not the white strings and white mush. Discard the gray featherlike gills and tough bits of cartilage. Break the body in half and then twist off legs. Put all the crab legs and white body part in the soup, discard head. Simmer for 2 hours, taste and stir, add extra seasoning if you chose. Skim off excess oil and serve with rice or French bread. The gumbo must be cooled before you place in fridge or freezer.


References


Dry, Stanley. A Short History of Gumbo https://www.southernfoodways.org/interview/a-short-history-of-gumbo/. Accessed 30 Nov. 2016.

Huntsman, Mark. Gumbo History https://whatscookingamerica.net/History/GumboHistory.htm. Accessed 30 Nov. 2016.

Gumbo History! The Cajun and Creole influence! www.gumbocooking.com/gumbo-history.html. Accessed 30 Nov. 2016.

Bhabha, Leah. The History of Gumbo4 Apr. 2014, https://food52.com/blog/10105-the-history-of-gumbo. Accessed 30 Nov. 2016.

Romar,Megan.Gumbo,goneworleans.about.com/od/neworleansrecipes/fl/Gumbo.htm. Accessed 30 Nov. 2016.

Gumbo https://en.wikipedia.org/wiki/Gumbo. Accessed 30 Nov. 2016.

Gumbo Origin and History www.foodreference.com/html/artgumbo.html. Accessed 30 Nov. 2016.

Vogt, Justin. Gumbo: The Mysterious History29 Dec. 2009, www.theatlantic.com/health/archive/2009/12/gumbo-the-mysterious-history/32659/. Accessed 30 Nov. 2016.

Moss, Robert. The Real Story of Gumbo,Okra, and File, Glode Pequot, May 2015, www.seriouseats.com/2014/09/history-new-orleans-gumbo-okra-file-powder.html. Accessed 30 Nov. 2016.

Wuerthner, Terri. Cajun Roux – What is it16 Nov. 2016, southernfood.about.com/od/saucesandseasonings/a/roux-recipes.htm. Accessed 30 Nov. 2016.


Feibleman, Peter S. The American Cooking- Creole and Acadian. Time-Life Books, 1971.

https://www.eatyourbooks.com/library/54612/american-cooking-creole–acadian


Tamales of the World

tamale-image

In the United States, when one hears the word tamale, it resonates as one of the quintessential foods that depict Mexican culinary culture. Along with enchiladas, burritos and margaritas; tamales tend to bring images of steaming masa and aromatic teases of their mysterious fillings into focus. Yet as we will come to realize, tamales vary and truly span Latin America and the world.

It’s very common to go into most Mexican restaurants and order tamales at any time of the year (after the obligatory basket of chips and salsa) yet in reality tamales are not a daily item on the family menu for dinner.  The preparation of tamales can be quite laborious and systematic as there is sequential symphony that needs to take place to get them completed. From preparation of the masa (a thick batter that encases whatever filling is opted for), soaking the corn husk which is what the delicate package is wrapped in, preparation of the filling which can be essentially anything one can imagine (meats, seafood fruits, vegetables or nothing at all). An assembly line of husks, masa and fillings is assembling proximal to a large stock pot with boiling-hot water which will serve as the steaming vessel for the assembled tamales.

Due to the laborious nature of tamales, one could say that they are seasonal or reserved for special occasions. So typically one finds the preparation and enjoyment of tamales around the fall holidays of Christmas and New Year (and thanksgiving in the United States). So was the case in my family in which tamales would be prepared with precision and efficiency by my mother and five sisters when a festivity was at hand. An interesting story that my mom would commonly tell right around my birthday involved tamales. A sister’s birthday is the day before mine so apparently for her ninth birthday my mother had made tamales for the birthday party and once the party was over of course clean-up ensued.  Needless to say my mother wasn’t able to completely clean-up her kitchen to her liking being that I “decided to start my arrival later that night”.  So ever since then, besides having consecutive birthdays, we also shared a story related to tamales.

Again, most people enjoy tamales as a Mexican dish but in reality they are a food that originated in Mesoamerica and span the world in various iterations. Tamales were enjoyed by several pre-Hispanic cultures such as the Aztecs, Maya, Olmeca and Tolteca. Easily portable, due to their husk encasing, they were the ideal meal for taking on their army expeditions, hunting trips or migratory odysseys.  Ingredients typically included such oddities as iguana, deer, peacock and the likes.  Towards the southern areas of Mexico (such as Oaxaca and Chiapas) and into Central America, tamales are essentially the same (masa, filling, and wrapped) but vary in their wrapper; in place of corn husk are banana leaves. This gives the masa a different texture and subtle flavor. As one investigates further into South America, that region also has their version of tamales. Tamales Salteños are found in Argentina, sweet Humita are found in Peru, Argentina, Ecuador and Bolivia. Brazil has pamonha and Venezuela has hallacas. Most surprising to me was that the Phillipines also has a variation of tamales called Binaki which include fillings of chicken, pork and peanuts but the masa is made of rice flour and not the traditional corn meal masa. This was in part due to the many years of Spanish rule and being governed as a Mexican province.

If any of you are looking for recommendable tamale establishements, recommended is Maria’s Tamaleria in Lynwood where you can find a variety of prepared tamales or a local farmens market such as Torrance City Farmers Market .  ¡Buen Provecho!Tamales

Tacos Dorados de Papa

tacos-dorados

Tacos Dorados de Papa


Symbolic:

My mother use to make these a lot for us when we were children. The people from church would always ask her to make them for the parish festival. She would roll them up and called them flautas, but I found it easier to just fold the tortilla in half and make a taco shape and not have to deal with the flauta coming undone. Some people put a toothpick to make them stick, but I think that looks disgusting, plus, biting into one is not fun. I just make my tacos dorados stick with the melted mozzarella cheese. Another subconscious reason I may not like making flautas is because when we were kids, my brother was trying to cool his off and blew on it and the hot ground beef came flying in my face. My family and coworkers are fond of my tacos which makes me feel good because I don’t cook too often, but when I do, it’s big and most of the time it’s good. Over the years, I have added toppings or different seasonings to my tacos, but it all started watching my mother make her delicious flautas.


Nutritional Analysis

I would like to focus on one of the main ingredients – the potato. Although we think of the potato as a fattening food source, it is considered a healthy food only when you lay off the fattening toppings, and oil. I don’t think too many Americans eat the healthy version. They contain vitamin B6 and are a good source of potassium, copper, vitamin C, manganese, phosphorus, niacin, dietary fiber and pantothenic acid.


Political-Economic Analysis

The potato is originally from the Andean mountain region in South America – the mountains are located on the western part from top to bottom. Spanish explorers discovered it and took it to Europe. Irish immigrants brought it to the United States in the 18th century, but large scale cultivation didn’t occur until the 19th century. Today, China, Russian Federation, Poland, India, and the United States are the main producers. Potatoes are grown commercially in 30 states, but Idaho grows much more than any other state. Although China is the top producer of potatoes in the world (95,987,500 tons), the United States is above many others in fifth place (19,843,900 tons).


References

Alena Bosse and Michael Boland, Kansas State University. Potato Profile. Revised April 2014 by Shannon Hoyle, AgMRC, Iowa State University AgMRC (Agriculture Marketing Center). http://www.agmrc.org/commodities-products/vegetables/potato-profile/. Online 15 Nov. 2016.


Potato Pro. Top 25 Potato Producing Countries

http://www.potatopro.com/world/potato-statistics


The World’s Healthiest Foods – Potatoes

http://www.whfoods.com/genpage.php?tname=foodspice&dbid=48

Lemon Chicken and Potatoes

Hi, Im Emily. I am a senior in the IDS program.  I am a traveler but I dont like taking photos.  I have been to Europe, Canada, and most of the United States.  I like to consider myself a cook and I take after my grandmother who criticizes every dish put infront of us.  Thankfully, unlike her, I know how to cook.  I am part Greek and I have inherited the Greek need for lemon, garlic, and fresh food.

My favorite dish is Lemon chicken and potatoes.  That is my staple food.  Although I enjoy greek food, I am adicted to sweets.  I am pretty sure that I am so close to having diabetes.

To make lemon chicken the greek way is to heat the oven to 375F.  Then take the chicken brest or what ever chicken you want, rub it down in salt, peper, and minced garlic.  Next you cut red or golden potatoes into wedges an place in a pan that has at least two inch high sides.  Pour olive oil on the potatoes and sprinkle salt and peper over the potatoes.  Next, place the chicken over the potatoes so that they are sitting ontop of the potatoes. (note: you can substitute the potatoes for Orzo, the greek pasta.  Only thing you need to do is add a cup of water to the pan. The ammount of water depends on the quantity of orzo.)  Squeeze half a lemon over the chicken and potatoes.  Place in oven and set a timer for 15 min.  When the timer goes off squeeze more lemon on the chicken and potatoes. (If you are doing orzo put a little more water in the pan if the orzo is still looking raw.)  Cook for another 30 min.  The chicken and potatoes will be done when the potatoes look golden brown and the chicken is slightly brown.  When you take out the chicken squeeze a little bit more lemon on the chicken and potatoes.  Lemon flavor likes to cook off.  and you are done.

Last time I hade good Lemon chicken was in Greece.  It paired really well with red wine only because I love red wine, even though you are supposed to pair white wine with fish and chicken.

-Emily11817212_10205712980478052_6353283073420404876_n

Spanish Rice!

agw7tzwgq1m8klctyfvg_spanish-rice-3

Spanish Rice, or as I like to call “Grandmas Orange Rice.”

I chose Spanish Rice for my food presentation, as this has always been a very sentimental dish to me. My grandmother Ernestina is a second generation Mexican-American from a city called Guadalajara. She had 5 brothers and 1 baby sister, and was considered to be the cook of the siblings. She also has been a housewife for the last 50 years, therefore has cooked my grandfather each breakfast, lunch, and dinner. My grandmother is a phenomenal cook however her Spanish Rice has always been my favorite since i was a kid. I myself having 2 brothers and 3 sisters, have also been bestowed as the cook of all of us. I have truly mentored my grandmothers cooking and continue to do hoping I become just as good. This particular dish took me roughly 2 1/2 hours (longer than normal rice) to make and I confidently say its pretty darn close to hers.

A little bit of background information I found when researching Spanish Rice was that it has went a long way from its origin. When the Islamic Moors (from North Africa), ruled Spain in 711 AD, they introduced rice. Spain then brought this rice to Mexico through the port of Veracruz. The Spanish also introduced this type of rice to the Philippines so there is also a heavy influence there. With each migration, the recipe has been slightly modified but overall pretty consistent. The basic necessities for Spanish Rice are white rice, tomato sauce, onions, water, lemon, salt and pepper. All of these items combined in a pot with a low simmer will create a creamy dish (in different quantities of course). What I love best about this dish, is that rice is universal. I made it a point to acknowledge how rich and poor it can be. It can be dry or creamy, as well as eaten alone or complimented with protein.  Although this is a simple recipe, I have yet to find a restaurant or store that makes it as wonderful as my grandmothers.