Grandma’s Beef Tamales! : }

History

The tamale is said to have been created circa 8000 -5000 BC by the indigenous people of Mesoamerica that started in the Mexican region and spread to Guatemala and the rest of Central American (khanacademy.org).

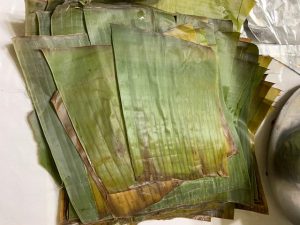
The tamale was created by the Olmecs, Toltecs, Mayans, and Aztecs who considered themselves the people of the corn. They all ate and used tamales for rituals and festivities. It is said that the tamale was created to be a meal on the go as well and used while traveling long distances. Wrapped in corn husks, it was the ideal meal for the hunter, and the indigenous armies as well. In Mexico, the tamale is usually wrapped in a corn husk while in parts of Central America the tamale is wrapped in a plantain or banana leaf, it depends on what is most bountiful in the region (khanacademy.org).

My family’s history of tamales.
Just like millions of Central and South Americans, my family celebrated the holidays with nostalgic foods such as tamales, pozole, menudo, capirotada (bread pudding), buñuelos a (crispy flour, cinnamon, and sugar pastry), horchata a (cold milk, rice, and cinnamon drink), and champurrado a (hot chocolate corn-based drink). However, what every member of my family anticipated for the holidays was the tamales, both beef tamales, and sweet pineapple and raisin tamales. These two-holiday staples were also on our family’s menu for the holidays. The reason for the tamales being the main dish with so many other items being served was because it was nostalgic to my grandparents, my father, and all my aunts and uncles. The reason for the tamale being nostalgic was because my grandparents had twelve children and feeding twelve children required getting creative with food and with rationing, so she would make very small tamales to feed her family of fourteen. For the holidays my grandmother Elvira, just like millions of other mother cooked tamales. However, my grandmother’s tamales were small but packed with so much flavor. Her recipe is one I have not found anywhere else but in my fathers’ family’s kitchens. My grandmother no longer cooks for the holidays because she now is eighty-five years old. Now, my aunts and my mother have taken the responsibility of carrying on with my grandmother’s recipe and cooking for the holidays.

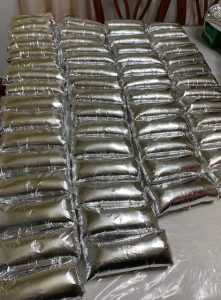
My grandmother’s tamales were made with beef instead of the more popular chicken. However, I prefer the beef over the chicken tamale any day. She served her tamales with a garlicky red salsa and a cup of hot Champurrado. What makes my grandmother’s tamales so nostalgic is the size of the tamale and how she wrapped them. The tamales looked like little pouches and unwrapping them was like opening a small gift. This was very important to me because as a child my siblings and I did not receive any Christmas gifts. The tamales were like our gifts so unwrapping them was meaningful to us. Coming from a large family was economically hard for everyone around the holidays and having something to eat was a blessing.

Now as an adult the tamale preparing responsibility has fallen onto me. My mother Martha can no longer take on the responsibility of making the tamales on her own because she has carpal tunnel syndrome. Although my mother helps me in making the tamales; it is my responsibility to wake up at 4:00 am on December 23rd of every year to buy masa, corn husks and other ingredients for the tamales. From there I drive to my mother’s house where I start preparing everything for the tamales, from washing the pots and corn husks, to cooking the chilies and beef. The process usually takes about 6 to 8 hours but it’s all worth it.

I am glad to carry on the traditions and responsibilities of making my grandmothers’ tamale recipe. I know my grandmother and parents are proud of me for taking on the responsibility. I can confidently say that I have my grandmother technique and recipe down perfectly.

My grandmother’s tamale recipe was based on the taste preference of using beef instead of chicken. She also says that the use of beef over chicken was due to it being more filling and with too many children to feed, and a couple of beef tamales would make for a hardy meal for such a big family.

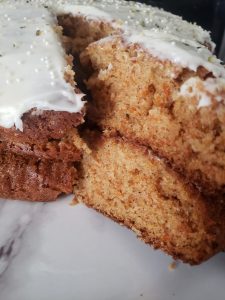
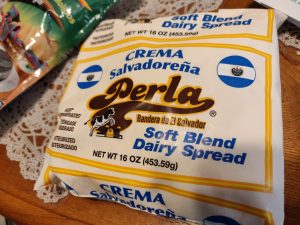
The tamale is such a diverse dish in the sense that the ingredients used range from region to region in Mexico. Some regions make cheese tamales, others make sweet pineapple and raisin tamales. In other parts of central and south America, the tamale is wrapped in plantain leaves and stuffed with a softer masa, chicken, and vegetables. One tamale all central and south America share is the corn tamale. This type of tamale can be either salty or sweet. The corn tamale is made of fresh corn puree, lard and salt or sugar to taste. This type of tamale is usually served with a slice of salty cheese or sour cream.
I would say I’m a tamale connoisseur because I have eaten all sorts of tamales. I’ve tried 10 different types of Mexican tamales, 4 types of Salvadorian tamales, 1 Guatemalan tamale and hope to continue to try different types of tamales from all Central and South America.

My husband’s family is also very knowledgeable in making tamales. My mother-in-law makes Salvadorian tamales twice a week, every week. Though my husband’s tamale story is different from my story. His mother started making tamales in El Salvador during the 1980’s civil war. During this period much of El Salvador was going through tough times and finding employment was hard. My in-laws decided to make money by selling tamales in factories and mechanic shops. They developed their recipe from what they could remember from their mothers making tamales. With trial and error, they were able to develop one of the tastiest Salvadorian tamales I have ever tasted, and I have tasted a few.
Though I have been in the kitchen helping my mother in law make her tamales several times, I have yet to record her recipe. I feel that it is my responsibility to keep her recipe going as well, for my husband’s sake, since my mother in law will be retiring soon and plans to move to El Salvador.

To make my grandmother’s Tamales, I usually buy 25 pounds of masa, 3 bags of dried corn husks, 15 pounds of chuck beef, 2 bags of dried California chili pods, 6 garlic gloves, ½ tsp of salt, 1/2 cup of Knorr bouillon,1/3 teaspoon of ground pepper, and 1/4 cup of white vinegar. This amount makes about 75 tamales. However, for the class, I will breakdown the recipe to make 25 tamales.

Grandmas Tamales

Ingredients:

  • 10 Lbs. Nixtamal Masa
  • 1 bag of dried corn husks
  • 5 pounds of beef cut into 1-pound chunks
  • 1 bag of dried California chili peppers
  • 1 bag of dried Guajillo chili peppers
  • 1 onion
  • 6 garlic cloves
  • ½ Knorr bouillion
  • 1 tsp of ground pepper
  • 1/8 cup of white vinegar

Kitchen tools:
You are going to need the following Kitchen tools: a blender, 15-quart pot, large strainer, a 10-quart pot, a large aluminum tray, a 25-quart steamer pot with a rack inside, 2 tablespoons, an electric mixer, and a roll of aluminum.

Preparation:
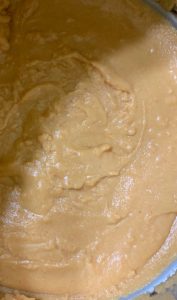
First, wash your corn husks and leave them soaking in water overnight so that the corn husks are soft and ready to use the following day. Now that corn husks are ready, drain the water and lay them out on your table. Then start cooking your beef in a 15-quart pot. Cook the beef, fill your pot with approximately 7 quarts of water. Place your beef in the pot add 2 garlic cloves, half onion, ¼ cup Knorr bouyon, ½ of tsp salt and ½ tsp of pepper. Cook until tender. Then remove the beef and let it cool. Once the beef is cold shred the beef. Now you’re ready to make the sauce in a 5-quart pot add 3 quarts water. Add the bag the bags of California and Guajillo peppers, 2 cloves of garlic and boil until soft. Then blend the peppers with 2about 2-3 cups of water, 2 cloves of fresh garlic, ¼ Knorr, and 1/8 cup of vinegar. Blend until you get a watery consistency. Strain the Sause and add it to your shredded beef and stir it so the sauce is evenly distributed. Now pour your Nixtamal Masa onto an aluminum tray and with an eggbeater, mix the masa for about 3-5 minutes. This will make your masa’s consistency fluffy when cooked. Place a 25-quart steamer pot with the rack inside and add 2- quarts of water on a chair next to the table where you will be wrapping your tamales. Now you’re ready to wrap your tamales.

Take a corn husk and feel both sides of the husk, the husk has a smooth and a grainy side. You want to place the grainy side on your hand with the smooth side facing you. Then scoop 2 tablespoons of masa onto the smooth side of the husk and spread evenly. Then scoop a tablespoon of beef and place it in the middle of the masa. Then roll one corner of the corn husk toward the other side of the husk, roll into a cone shape. You should have a long strand of corn husk at the bottom. Take the bottom of the husk and fold upward. You should end up with a rectangle shape tamale with one side open. Place each tamale into the pot with the opening face up. Do this as your wrapping each tamale. Once you are done place corn husks on top of your tamales, inside the pot and cover the top of the pot with aluminum foil. This will help in the steaming process so that your tamales are evenly cooked and moist. The husks help the steamer retain water as vapor and will cook the masa. Place your pot on the stove and cook on high until the water boils and you see steam. Then bring down the heat to low and cook for 2 hours. Make sure that the water does not dry, or your tamales will burn. Once the two hours are over, turn off the flame and let the tamales cool before you can serve your tamales.

My family makes a green tomatillo salsa to serve with their tamales. Here is to make the salsa verde.

Salsa Verde:
• 1- pound of green tomatillos
• 2 serrano peppers
• 1- clove of garlic
• 1- Cilantro
• ½ tsp Salt
• 1/8 tsp pepper
• 1/8 onion

First, add 1-quart of water to a 5-quart saucepan and add the tomatillos, serrano peppers, and onion to the water and bring to a boil. Boil until both the tomatillos and peppers are soft. Then pour the tomatillos and serrano peppers into a blender and add 1 clove of garlic and salt and pepper. Blend for 15 seconds or until it’s a watery consistency. Pour the sauce into a bowl and chop about 1/8 cup of cilantro and 1/8 onion and add these to the sauce. Now you are ready to eat your tamales with salsa Verde.
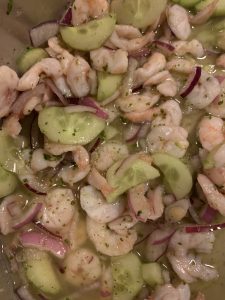
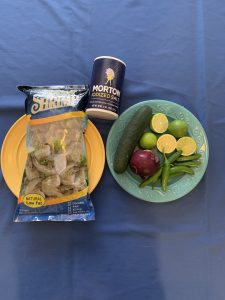
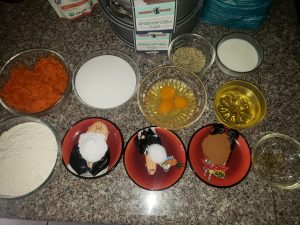
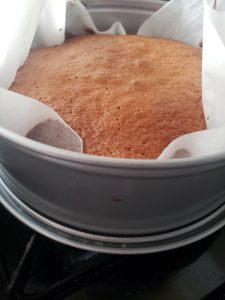
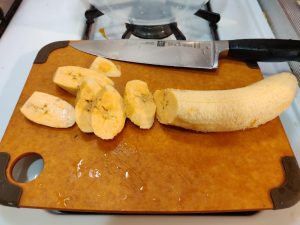
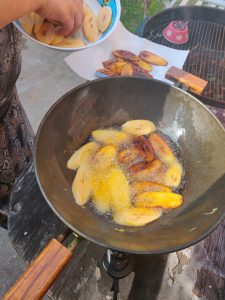
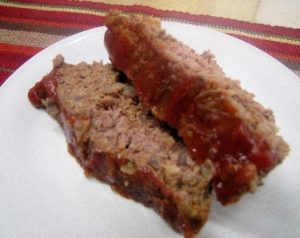
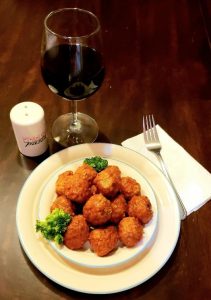
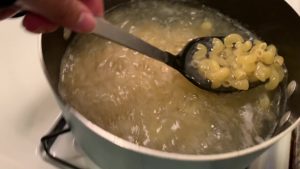
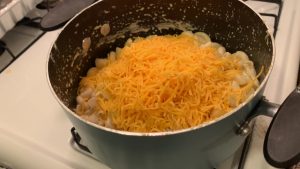
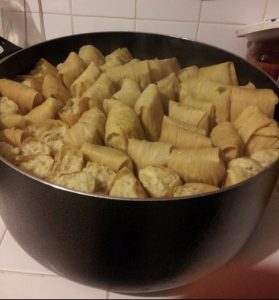
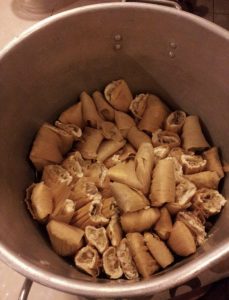
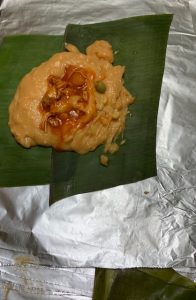
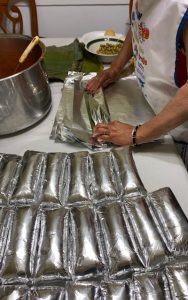
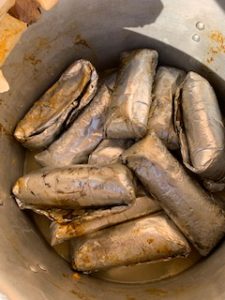
Photos:
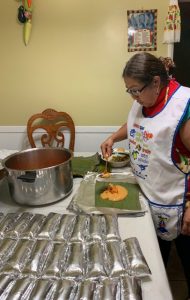
The photographs posted are of both Mexican and Salvadorian tamales and the tamale-making process. Here you can see my mother in law making her delicious Salvadorian tamales. I decided to include pictures of her making her chicken tamales because it is very meaningful to her that I share her family’s traditions. I must say that making her Salvadorian chicken tamales is much more complicated than making the Mexican tamales. She was thrilled to know that I included her tamale traditions in my assignment. She told me that she would not mind sharing her recipe, but it was so complex to put into writing, so I decided to share my family’s Mexican tamale recipe.

References

Merguez- Sharpnack, Yvette. Tamal Dough (Masa para Tamales) +video. November 25, 2019
https://muybuenocookbook.com/tamal-dough-masa-para-tamales/

https://en.wikipedia.org/wiki/Nahuatl
https://en.wikipedia.org/wiki/Champurrado

Dr. Kilroy-Ewbank, Lauren. Khan academy Mesoamerica, an introduction
https://www.khanacademy.org/humanities/art-americas/beginners-guide-americas/a/mesoamerica-an-introduction
https://www.bonappetit.com/story/what-are-tomatillos

Cartwright, Mark. Ancient History Encyclopedia, Toltec Civilization. April 27, 2018.
https://www.ancient.eu/Toltec_Civilization/
https://www.history.com/topics/ancient-americas/maya

https://www.ancient.eu/Olmec_Civilization/

https://www.britannica.com/topic/Aztec

ENCYCLOPÆDIA BRITANNICA
https://www.britannica.com/place/El-Salvador/Civil-war
https://en.wikipedia.org/wiki/Capirotada
https://www.isabeleats.com/mexican-bunuelos/

https://en.wikipedia.org/wiki/Guajillo_chili

https://wholespice.com/blog/california-red-chile/https://wholespice.com/blog/california-red-chile/


Agua Chiles

Lent, seafood and my papa’s agua Chile

Lent is described as a 40 day remembrance period that honors the time that Jesus Christ spent fasting in the desert, in which he endured temptation by Satan. In commemoration of Christ’s fasting and sacrifice, Christians across the words observe lent by fasting, praying, giving up something they enjoy and eating a special diet for the duration of 40 days of lent. One of the traditions of lent is eating seafood. My family observes lent by fasting and praying on Fridays. Usually, my family fast during the early part of the day and offer their fast in prayer as a sacrifice before they serve and eat dinner. The menu on Fridays during lent usually consists of a seafood dish such as agua chiles, seafood cocktail, fried tilapia, and seafood soup. On the last day of lent my family would usually celebrate by going out for dinner at a seafood restaurant.
My husband’s family’s lent tradition is usually observed by not eating beef, chicken or pork on Fridays for the duration of lent. His family concludes by having a traditionally big seafood dinner that includes eating fish soup, but this soup is not just any fish soup. It is made from dried fish with id battered with flour, egg, spices and boiled in a broth. Other dishes served during the end of lent are paella and shrimp ceviche.
One of my childhood memories involves eating seafood with my father and uncles. Before my dad’s family became evangelical, they would often drink and to get rid of their hangover my father and uncles would cook different seafood dishes. One of my favorite dishes my father and uncle would prepare is agua chile. I decided to share this dish with the class for my presentation because it’s easy to prepare and does not need to be heated to serve.
The way my family usually prepares agua chiles for about 20 people is by using 5 pounds of washed, peeled and deveined shrimp, 2 cilantro, dicing 8 cucumbers into small pieces, 5-8 serrano peppers, slicing 4 red onions and squeezing 8 pounds of limes which will produce about one litter of lime juice. First, slice the shrimp in halves and place the shrimp in a large bowl. Then blend about 2 cups of lime juice with 5-8 serrano peppers, one cilantro, and one eight red onion. The consistency of the sauce should be watery. Add the sauce to the shrimp, add salt and pepper to taste. Cover the bowl and place in the refrigerator to chill for about 30 minutes. Then remove from the refrigerator add the chopped onions, and cucumbers. Now it is ready to serve, serve the agua chiles with tortilla chips or saltine crackers. Enjoy!
Facts about shrimp:

· Over five billion pounds of shrimp are produced every single year and one billion pounds of shrimp are consumed in the United States each year.

· There are over 2,000 species of shrimps.
· They usually live from 1 to 7 years.
·
Why do Shrimp, Salmon, and lobster turn pink or red? Well, Shrimp, Salmon, and lobster are some ocean creatures that when cooked change in color. All contain a protein called carotenoids (which are pigments), that breakdown when cooked and change pigment (huffpost.com).

Americans Consume One Billion Pounds Of Shrimp Annually


www.huffpost.com › shrimp-turns-pink_n_588f7d06e4b0522c7d3bf2a7

Mom’s Albondigas Recipe


As my presentation I chose Albondigas which is the Spanish version of the meatballs and has been one of my favorite childhood dishes my mom made.  This dish originated from Spain in the 16th century and introduced to Mexico when the Spain conquered Mexico.  As time passed the origin of this dish has changed.  This dish along with all the soups my mom made was and still are a Mexican soul food.  This is a Mexican dish and depending on what city in Mexico you reside in the recipe becomes uniquely different.  This soup to me is more like a comfort food especially during the cold or rainy weather.  As I was growing up, I was very fortunate to come home to fresh home cooked meals because my mom was a stay at home mom.  I always looked forward to whatever my mom made especially this delicious soup on a cold rainy day and it was the best.  We often ate this with a tortilla with some mayonnaise smothered in it and little squirt of lemon, it was the perfect combination.  I have also tasted my mother in laws albondigas and it just didn’t compare to my mothers’ recipe as it has been by far the best as it is quite unique.  The distinctiveness of my moms’ dish is the mint, it adds a little kick to the meat balls. The chayote which is an edible plant in this soup to me doesn’t have any taste to it but the texture of this squash is actually good.  It is low in calories but has lots of fiber, antioxidants and is good for any diet.

ingredients:

1 tomato cut in slices                                                                            1 half white onion sliced                                                                         1 can of tomato sauce
1 sliced potato
1 sliced chayote
baby carrots
sliced celery
1 pd of ground beef
bundle of mint diced
tomatillos diced
onion diced
1 egg

Also, the veggies in the albondigas have vitamins and the ground beef is good protein.  This soup is so flavorful that I always wanted seconds.  I learned to make this recipe now that I have kids and I am happy to say that I mastered my mom’s recipe because I am not a fan of cooking.  My sister also has told me that I happen to make this dish better then her and that it taste just like my mothers.  My connection to this food now is that albondigas represents our culture and family connections.  Whenever I make the family recipe my siblings get excited and ask if they can come over for dinner. This dish happens to brings my family together and that makes me happy that I am able to do this by mastering my mom’s Albondigas.  This project has helped me appreciate my mom’s recipe(s) and by taking pictures of this specific recipe it inspired me to make a recipe book.  My mom is getting older and I find that the recipes are getting lost as no one is really making them anymore. When my mom cooked she always made enough that her house was all of our stopping point after work.  However, as I was making this recipe and taking the pictures of my dish it truly inspired me to make a family cookbook and share with my family so that her dishes will always remain.

Carrot Cake Recipe

Carrot Cake

Carrot Cake is widely known for its sweetness, moistness and carrot taste.

Brief History:

“Carrots gained substantial recognition in British baking during World War II. With there being a food shortage, the British government began to consider alternative cuisines upon the carrot. In an effort to encourage carrot intake the Food Ministry launched the “See in the Dark Campaign.” (Hannah Abaffy) British citizens eventually got creative and started adding carrots to everything they put their mind to. However, Carrots had already been used in cakes back in Medieval times. Sweeteners at that time were expensive to purchase so individuals relied on naturally sweetened vegetables and used it as a substitute for sugar.

When Carrot Cake made its way to America, it made dessert history. Carrot Cake was a novelty item and then was put on menus allowing it to be popularized. It wasn’t until the 1970s when people were concerned about how healthy carrot cake really was. (Jessie Moore) Some people believed that because the carrots were healthy then the cake was healthy too. But in reality, with all the other ingredients combined, the modernized American carrot cake was bound to be made with much higher sugar intake.

From then on, carrot cakes have come a long way.

Carrot Benefits:

Carrots are one of my favorite vegetables. Knowing that they are beneficial to one’s health is a bonus. Carrots are highly nutritious. They are a good source of antioxidants, potassium, fibre, vitamin k1 and beta carotene. I have to mention, “Carrots are mainly composed of water and carbs.” (Adda Bjarnadottir) Carrots are very low in fat and contain Vitamins A/B6/K1 and potassium which are good for blood pressure control. Vitamin A promotes good vision, Vitamin B6 aids the conversion of food into energy, K1 promotes bone health and blood coagulation. There are many advantages towards the consumption of carrots.

When I was younger, I was obsessed with my moms’ Carrot Cake. My mother would make a carrot cake every Easter or upon request to satisfy a sweet tooth. We would have family gatherings every Easter and everyone would take a plate of food and of course, my mom being the best baker in my eyes, had the best dessert platter. Everyone enjoyed it. Whenever I ate my mom’s cake during Easter, being in Spring, it brought me a sense of gratitude because my family was all together having a great time. My cousins and I would run around looking for Easter eggs that were stuffed with prizes like little balls, stickers, bracelets and even dollars. My family wouldn’t allow the Easter eggs to be filled with candy as it was something they were against. They opted for more of a wiser, fun, and healthier option rather than giving us plain candy. Therefore, being that we weren’t given candy I would get ecstatic when I would finish my food and was allowed to get a slice of her cake. As a kid, you love anything sugary. Her cake essentially replaced the candy that we weren’t given, though, I’m not complaining because she was trying to be a good mother. As I am older, I try to resist sweet confections. Though it has been tough trying to withstand her cake as it is delicious but here and there whenever I catch her making it, I get a little sample to reminisce all those times that I was a care-free child.

My mom’s cake was not the typical carrot cake that contained raisins, walnuts/pecans and cream cheese frosting. She had got the recipe from a random cookbook and adjusted it along the way. My mom tweaked the cake to our or should I say my preferences. The original recipe used two cups of sugar but it was too sweet so she started using 1 1/3 cups of sugar. I’m one to eat raisins alone but when they’re integrated with something else it’s a no for me. Also, I wasn’t a fan of cream cheese frosting and as a child, I didn’t enjoy any nutty flavors either. So, with my picky fondness, she excluded raisins and substituted hemp seeds (they’re safe!) for walnuts/pecans and depending on the occasion she would add vanilla frosting. For Easter, she would add frosting to the cake but if it was made at home to satisfy a craving, she wouldn’t add any frosting to it. She used the best ingredients she could when it came to baking the cake. She preferred organic ingredients and was cautious of sugar intake. Now that I am grown, I want to share her adjusted recipe so it’ll become a generational thing in my family. I want to keep this recipe going so everyone can know how delicious it is.


Makes Two 9-inch Cakes

Approximately 2 hours

Ingredients

  • 2 Cups of All-Purpose Flour
  • 2 Teaspoons of Baking Soda
  • ½ Teaspoon of Salt
  • 2 Teaspoons of Ground Cinnamon
  • 3 Large Eggs
  • 1 ⅓ Cups of Sugar
  • ¾ Vegetable Oil
  • ¾ Cup of Buttermilk
  • 2 Teaspoons of Vanilla Extract
  • 1 ½ Cups of grated Carrots
  • ⅓ Cup of Hemp Seeds

Optional: Sprinkles, Whipped Vanilla Frosting

Directions

The first step would be to turn the oven on to 350 degrees so it can preheat meanwhile you combine all of your ingredients and position a rack in the lower third of the oven

Line both 9-inch cake pans with parchment paper; lightly grease the parchment paper with butter and flour; Set them aside

DRY ingredients- In a large bowl combine the flour, baking soda, salt and ground cinnamon all together; giving it a stir with a whisk

WET ingredients- In a separate bowl beat eggs and then add the sugar, oil, buttermilk and vanilla extract; giving it a stir as well

Add the wet ingredient mixture to the dry ingredient mixture; beat until smooth texture

Fold in grated carrots and hemp seeds to the mixture (can be pecans/walnuts)

Pour and divide batter into the two prepared cake pans

Bake for 30 minutes or until a wooden pick or fork inserted in the center comes out clean

Remove cake from pan by pulling it out with the parchment paper and place it on a wire rack

Let cool for 15 minutes

Once cooled, remove parchment paper and place on a flat plate or surface and  frost the cake with a frosting of your choice and decorate to your desire (optional)


All photos by me


Abaffy, Hannah. “Carrot Cake Good Enough to Win WWII.” milkandhoneythebakery.com/carrot-cake-recipe-history-wwii/.

Moore, Jessie. “The Story of Carrot Cake.” http://www.unicornlove.com/blog/2012/8/1/the-story-of-carrot-cake.html

Smith, K. Annabelle. “A WWII Propaganda Campaign Popularized the Myth That Carrots Help You See in the Dark.” www.smithsonianmag.com/arts-culture/a-wwii-propaganda-campaign-popularized-the-myth-that-carrots-help-you-see-in-the-dark-28812484/.

Ngo, Irene. “Baking Technique: Folding.” www.chatelaine.com/recipes/chatelainekitchen/baking-technique-folding/.

Newman, Tim. “What Is Beta Carotene? What Are the Benefits?” www.medicalnewstoday.com/articles/252758.

Bjarnadottir, Adda. “Carrots 101:Nutritional Facts and Health Benefits” https://www.healthline.com/nutrition/foods/carrots

“Hemp Seed – What You Should Know and Tips for Baking With It.” www.cupcakeproject.com/hemp-seed-what-you-should-know-and-tips/.

Platanos Fritos

In my presentation, I decided to talk about a dish that my parents introduced to me as a child.

The reason why this dish is so important to me has to do with a lot of things. When I was young, I would hear my father and mother talk about the war that ruined their lives. I didn’t know much about the country that was called “El Salvador”. I grew up with African Americans and Mexicans around me. I was not proud to be latina nor thought great things about a country I never visited. However, even with all of this, I felt like something was missing in my heart. Not only would I neglect the country my parents fled, I also wanted to flee the city I was born in. After a trauma that led me into depression, I wanted to escape.

Sadly, the pride I felt for being Salvadorian did not happen until I moved away to University in Humboldt county. After truly understanding what it meant to be homesick, I came back home to Los Angeles and my perspective on things changed.

Back then, I remember I would say I was from another ethnicity because I wasn’t proud of who I was. I honored other cultures but did not do so with mine. All of that changed when my father decided to take me to El Salvador and visit my family when I came back to Los Angeles. That emptiness I felt was soon filled with a sense of familiarity I have never felt before when I stepped foot in a country that had its blood running through my veins.

Now when I eat a plate of Platanos Fritos, I think about the country my parents came from, the country where my extended family lives, the country I would have been born in if the war did not happen, the country that is struggling to get back on its feet. It makes me proud to be Salvadorian but also someone from Los Angeles. It makes me proud because I have been given an opportunity to succeed under terrible circumstances. I am able to meet cultures from all over the world and I am able to have an education.

When I think about my country, I see the faces of hardworking people, of people who are determined to survive, and of people that seem familiar to me. I am now proud to say I am Salvadorian and want people to know more about this really small central American country.

I am proud to say I am Salvadorian but also from Los Angeles. That I am neither from here completely or there but I am a unique combination of both. When I have children, I will make them this dish and show them to love everything about their unique mixture of culture as well. I am excited to show them that part of their culture and the culture of my husbands. I believe that food is very powerful and can bring people together. I also believe that it is important to never forget the recipes that tell a story about a certain group of people.


Banana-Nut-Chocolate Chip-Muffins


I have a special fondness for banana nut bread.  Not only is it a delicious comfort food, but I have several memories associated with the bread that spans a period of time in my life from my high school days to the present day with my family.

I first baked (and tasted) banana nut bread in my high school Home Economics class.  I remember cooking and baking different dishes in class, but out of all of them, my favorite was baking banana nut bread loaves.  I can still remember tasting the distinct flavor of the sweet bananas and the crunchiness of the walnuts and surprised by how easy is was to make the recipe, using a few basic ingredients that are common in any household kitchen and of course the buttermilk.  I believe that the buttermilk is the secret ingredient to this recipe, as it is what makes the muffins so moist.  I kept the recipe long after graduating from high school and would bake the bread frequently until for some unknown reason I stopped.

It was not until we moved to our current home many, many years later (I was now married with children) that I found the recipe again and began baking the bread again. However, this time, for practicality reasons, I would bake them in a muffin tin and made muffins instead of loaves. I also opted to use cupcake liners, although not necessary.  Additionally, I began to roast the walnuts in the oven for five minutes and chopped them once cooled.  I read somewhere that by doing so it would enhance the nuttiness flavor of the nuts and bring out a buttery flavor of them.  This I found to be true and highly recommend this extra step.

One day my youngest son, then six years old, now twenty-three, asked me to add chocolate chips to the muffins.  I obliged and ever since then, I always make two batches of muffins- one batch of the original banana nut and the other batch of banana nut chocolate chip.  The new version of the banana nut recipe was a hit.

I often bake these muffins and take them to work for meetings or just as a “pick me up” at work for my staff to enjoy with coffee.  To this date, I still have family members who give me their over ripened bananas and ask me to make muffins for them.

Through the years, I’ve always enjoyed baking, and making these banana nut chocolate chips muffins are probably the item I bake the most. I especially love to bake in the fall and winter and during cold nights as the oven warms up the house.  Additionally, nothing beats the smell of bread baking in the oven.  The smell is so welcoming and to me evokes the memories I have associated with family.

My children are all grown and still ask me, “Mom, why do your muffins taste so good?” and I always reply, “Because I make them with love.”  The banana nut bread recipe has evolved from the original one I made long ago in high school to the one I call my own.  I will be posting the recipe for the cookbook. So, if you have any overripe bananas in your house and are thinking about what to do with them… get some buttermilk and bake some muffins.


Mom’s Meatball Meatloaf

This Photo by Unknown Author is licensed under CC BY-SA-NC

For my presentation I choose my Mom’s meatloaf because it’s a favorite of mine and my siblings.  It holds a deep and emotional connection for us because we grew up in a single parent home eating my mom delicious meatballs that evolved into her delicious meatloaf.  My mom had been out of the workforce for years, however after my parents divorced, she had to re-enter the workforce to take care of four young kids. She found that domestic worked as she only had a second-grade education,  she found that cleaning homes allowed her to be home before we arrived home from school to prepare a hot home cooked meal for us.

Photo by C. Gonzalez

Our favorite food was and still is her pasta with meatballs.  However, homemade meatballs are a time-consuming process that combines mixing all the ingredients, rolling them into evenly size meatballs, frying the meat balls.  Then you make the spaghetti sauce to finish the cooking process of the meatballs.  Now that my mom was now working, she needed to streamline her life.  She knew there would be no way for us not to have our meatballs with our pasta and for those days that we would arrive before her she needed something quick and easy for us to fix.  One day our neighbor brought over half of her meatloaf to share with us because it was too much for her and her husband to eat.   The meatloaf gave my mom a crazy idea; that’s when she came up with this idea of “meatball meatloaf”.  She was so excited about this meatloaf because it would be two meals in one.  Not only was it very tasty, but also very economical.  It allowed her to stretch the budget by making two meals from one dish.  My mom would make two loaves; one for sandwiches, and with the other, she would slice up into big cubes like meatballs, and cook them in her awesome sauce.  We all knew when she was baking her meatloaf because we could smell it while we all played outside.  Her meatloaf was so good that all the neighborhood kids would hang out at our house when she cooked it.  The smell of meatball still takes me back to the great days of when we would all run it and fight for a seat about the table to eat her meatball meatloaf. Thanks for the best food EVER!  Tutti al tavolo!

The nutritional benefits of meatballs:

Beef is a good source of iron and protein. You can enjoy its benefits without overdoing it, if you eat a modest portion. Meatballs are not bad for us because they contain essential amino acids which are good for our body.

Interesting facts:

  • It is believed that the Chinese were the first to create the meatball.
  • Meatballs found in almost every county all over the world. Meatballs are found throughout Europe, Middle East, South Asia, Canada, Mexico, United States, Central and South Americas just to name a few.
  • Spaghetti and meatballs are an American invention. Only American Italians eat spaghetti and meatballs.  If you ever get the opportunity to visit Italy, NEVER ask for spaghetti and meat balls.  A typical Italian meal consists of a first course (il primo) some type of pasta, rice or similar, a second-course (il secondo) of some type of meat or fish served together with a side dish (il contorno) some type of vegetable or salad, and typically ends with fruit and/or cheese, something sweet, and espresso.


References:

Arnarson, A. (2019, April 4). Beef 101: Nutrition Facts and Health Effects. Retrieved from https://www.healthline.com/nutrition/foods/beef

Meatball facts for kids. (2019, November 21). Retrieved from  https://kids.kiddle.co/Meatball#History

Toscana, Cucina ToscanaCucina. “Guide to the Traditional Italian Meal Structure.” Cucina Toscana, 22 Sept. 2015, toscanaslc.com/blog/guide-to-the-traditional-italian-meal-structure/.


-Caramel Apples- (Food Presentation)

Caramel Apples

Caramel Apples are a delectable treat. They bring joy into one’s face on the very first bite. It’s that sense that brings back memories or simply because the flavor is just that good.

Brief nutritional analysis:

Green Apples are not as popular as all the other common, red apples. Green apples at the grocery store are usually fully stacked as individuals hardly take them while there are only a few red apples. The only difference is the flavor. Green Apples have more of a sour taste while the reds are sweeter. That is why Green Apples are perfect to incorporate caramel with as the flavors are balanced out and not overly sweet. In addition, most people simply don’t realize that green apples are just as healthy as the others. They are packed with nutrients, are an excellent source of vitamin C, and have low-fat content. Also, they have high fiber content and are good for overall health. The saying goes: “an apple a day keeps the doctor away”. I have to mention though that eating an apple with caramel will only contradict that phrase as the caramel is essentially made of sugar. While the occasional drizzle or coating of caramel can have a place in your otherwise healthy diet, eating the sweet treat on a daily basis isn’t going to be quite beneficial to you. Too much sugar in one’s diet can really take a toll on their overall health.

Throwing it back to when these apples where first stumbled upon, a woman named Maria Ann (Granny) Smith from Australia tossed out some apple remains in a compost pile near a creek flowing behind her farmhouse. She soon discovered a small tree pushing its way through the pile. She noticed the apples growing were quite different. She then propagated the trees herself and eventually gained recognition for the uniqueness of the apples. Green Apples are known as Granny Smith apples because of her and in the 1890s they were awarded for Best Cooking Apple and to this day are one of the best to bake and cook with.

“The very first caramel apple was created when a Kraft Foods employee named Dan Walker melted down some of the company’s large stock of soft caramels left over after Halloween and dipped apples into the mixture as a healthier and crunchier counterpart to the soft candy. For years after their invention, caramel apples were dipped by hand—until 1960 when the first caramel apple dipping machine was invented by Chicago candy shop worker Vito Raimondi, whose uncle’s confectionery company is still the number one machine-dipped caramel apple company in business today.” Now to this day people have gotten very creative and have used a variety of toppings on their apples. Just a quick fun fact: October 31 is more than just Halloween because it’s also National Caramel Apple Day. That is a day I can say I’m truly grateful for as Caramel Apples are my favorite!
The apples that are used in the Dippin’ Stix Sliced Apples & Caramel are not organic. There is no type of label indication. In the ingredients list, they show that they have preservatives; Calcium Ascorbate and Citric Acid being two of them. I would say that it is a personal preference for one to choose organic. Organic foods are safer as chemicals are avoided in production and processing of farm produce but are costly whereas conventional apples are not. However, organic apples and conventional apples are both safe for consumption.


Telkamp, Mick. “Granny Smith Apples.” HGTV, www.hgtv.com/outdoors/flowers-and-plants/fruit/granny-smith-apples.
Houston, Gillie. “The History of Caramel Apples, and How to Make Them at Home.” MyRecipes, 10 Oct. 2018, www.myrecipes.com/course/dessert-recipes/history-of-caramel-apples.
“Walmart Grocery.” Walmart.com, grocery.walmart.com/ip/Dippin-Stix-Sliced-Apples-Caramel-2-75-oz/10324600?wmlspartner=wmtlabs&selectedSellerId=0&wl13=3101&adid=22222222420331748883&wl0=&wl1=g&wl2=c&wl3=305074695115&wl4=pla-546274454576&wl5=9031027&wl6=&wl7=&wl8=&wl9=pla&wl10=120643079&wl11=local&wl12=10324600&veh=sem_LIA&gclid=EAIaIQobChMI7NGatezh5wIVSx-tBh21bAePEAQYBSABEgIkC_D_BwE&gclsrc=aw.ds.

Fruta Picada

Fruta picada is a basic fruit salad that is eaten as a snack or dessert. However, what makes fruta picada special to me and gives it a little kick is adding lemon and chile powder. In Los Angeles, it is very common to see it sold by street vendors all over town.

Fruta picada originates from Mexico where it is served with a chile powder called “Chile de Arbol” that is much more spicier than what is used here in L.A. which is Tajin and has a hint of lemon flavor. I learned this the hard way as a child during a summer trip to Mexico. Although, burning my mouth didn’t stop me from continuing to enjoy this treat since then. Growing up I would often take family trips to cities in Mexico like Tijuana, Rosarito, Mexico City and Guadalajara, to visit family that still lives there, and this is where my love for fruta picada started. Fruta picada to me is always delicious but when you get it in Mexico it tastes so much better because of the fruit, there are so many to choose from. Typically, fruta picada consists of sliced watermelon, cucumber, mango, jicama, pineapple, orange, a good squeeze of lemon and a sprinkle of chile powder to taste but in Mexico they offer other fruits that are distinctive from the region like papaya, mamey, tuna, pitaya, guanabana, and cherimoya. I could go into what each one of these unique fruits are but for the sake of time I’d ask you just to google them if you are really interested.

I grew up in the 80’s and 90’s and my mom would take us almost every weekend to the swapmeet or “Callejones,” fruta picada was a treat that was a must to have no matter what especially since going to Mexico was something we would do only during school vacations. We’d get there really early in the morning but by midday I knew that a sweet, sour, and spicy treat was going to be a reward for waking up that morning.

We always made this in our house too, I can remember walking around the fruit stands in the market with my mom as she guided me to picking the best of the best out of the pile. Making sure to pick each fruit up and look at it for any bruises, squeeze it for firmness, paying attention to the color, and smelling it to guess the sweetness. This technique that I have now shared with my 16 year old daughter and 6 year old son. Even though lemon is added to the fruit once its all cut it is still very important to get the tastiest juiciest sweetest fruit so that you can get a burst of flavor in your mouth.

I remember sitting around the dinner table with my mom, aunts, and sisters everyone grabbing whatever fruit was around and a knife and preparing fruta picada while telling stories of the past or giving someone relationship advice, cracking jokes, sometimes crying but nevertheless sharing our time together as women.

It wasn’t until this assignment that I realized how special fruta picada means to me. It was hard for me to decide what dish to share and present on because I’m not a cook, I cook for my family, but they eat what I make only because they don’t really have a choice. But recently like a regular duty of mine, I was cutting fruit up with my daughter and mother-in-law, and it hit me the smell of fresh cut fruit and lemons really takes me somewhere and puts me in a great mood. Not to mention all the nutritional benefits that come along with this treat and the fact that it’s not a problem if you have a picky eater on your hands because you can use any fruit to make it. But the really great part is if you able to share your time with those you care about and allow it to be an experience that will give you meaningful memories that will stay with you forever.

Mom’s Mac and Cheese

Macaroni and Cheese have been in my family ever since I was born. Every Thanksgiving and Christmas my mom’s job was to bring her famous Macaroni and Cheese and box cake.  My grandmother cooked the rest without asking for help. It was impossible to get my grandmother to stop cooking so we could help, yet she always woke up in the wee hours of the morning and cooked everything without waking us up. In preparing for my food presentation, I asked my mother about her recipe and why it is so good.

Originally, my mother got her recipe from her mother who got it from her mother and so on. The original recipe included fewer ingredients and over the years my mother constantly improved it. She told me that there never a standard way of making mac and cheese.  All of the ingredients listed were approximated when combining them. There is no perfect way to make this macaroni and cheese because there are no definite measurements. Most of the measurements are mostly just seeing how much is enough or too little. Her recipe included:

  • Large Elbows noodles (about half of bag)
  • Sharp Cheddar Cheese (about 1-3 cups)
  • Cream Cheese (about 1 stick)
  • Chicken Broth (about half a cup)
  • Whole Milk (about 1/3)
  • Seasoning Salt
  • Pepper
  • Onion power
  • Garlic Powder
  • Flour (about less than 1 tablespoon)
  • Butter (about 1 stick)

The recipe fluctuates on how moist or dry you personally want your mac and cheese to be.

1. Boil water and add salt. After the water is boiling, add noddles and cook for about 8 minutes. Preheat oven to 350.

2. Strain noodles, add cream cheese and butter. Add chicken broth, seasoning, flour, and milk, (Don’t add too much liquid) then stir until thoroughly mixed.

3. Add cheese and stir. Add to baking pan and put in the oven for about 15-20 minutes and stir occasionally. Then add cheese on top and bake for another 10- 15 minutes.

Bringing mac and cheese for my food presentation brought back a bunch of memories of my family during the holiday season. For the last couple of years, my mom has been battling Leukemia. Although she is in remission it still took its toll on her body. This past holiday season my mother physically could not make her mac and cheese and cakes. It saddened me that my sisters and I had to step up to take over her role. It made me realize how much limited time we have on this earth and how food is a memory connecting us to love. My connection to this food goes back to my roots. In my family, we consider Mac and cheese soul food. Soul food is traditional dishes prepared and eaten by African Americans all around the United States. It was primarily eaten in the Southern United States from enslaved Africans. Soul food becomes a staple in African-American culture because of the migration of former slaves all throughout the united states and beyond. Soul food has many different influences and recipes, yet culturally it has been the main source of food for African-American families then and now.