Trap-A-Man Recipe
My sister was once told by a lovely little old lady that if she wanted to stop being single, she had to develop and perfect her very own Trap-A- Man recipe. It wasn’t enough to be funny, attractive or intelligent. Matter of fact, this sweet little lady said she didn’t even have to be pretty so long as she approached a man through his biggest weakness. For most men, that’s their stomach. “I got this!” she told her, and she hit the ground running. My mother has tried her hardest to teach me her amazing cooking skills and secrets, but I have never been and never will be gastronomically inclined! I don’t have the patience for cooking nor do I have the passion that people like my mom and my little sister have. Don’t get me wrong, I can whip up things that are edible. Some might even call my quick fix meals good or tasty, but I really just cook so that I don’t starve on days that I don’t go to my mom’s house. I prefer cleaning, cleaning is more relaxing, more satisfying to me. Cleaning a kitchen or a bathroom is very… controllable. Bleach sitting in a bathtub for a bit before I scrub it thoroughly won’t burn when you leave it unattended. You can’t over-mop a floor, but you can definitely oversalt a dish! So l leave the overly complicated trap-a-man cooking to my mother and sister, married 41 and 5 years respectively.
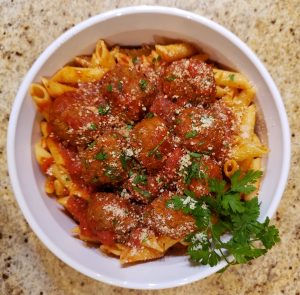
Dad’s Cold Leftover Burritos
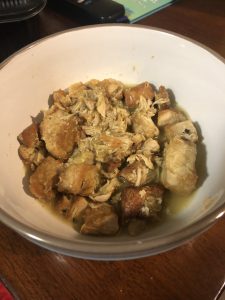
The one thing I did learn how to cook well and is my favorite dish of all time is costillitas (spare ribs) de puerco en salsa verde, or pork chile verde. Growing up, I looked forward to those nights that my mom would cook this delicious meal for my dad either for dinner or for his lonche. That’s the beauty of this dish, you can eat it for lunch in the form of a burrito or you can have a hot bowl of this green deliciousness along with a generous serving of white rice and beans. On days when he took pork chile verde burritos to his construction or demolition, lead and asbestos abatement job, my mom would wake up early in the morning and fill the house with intoxicating smells. Sometimes my dad wouldn’t eat all his lunch and he’d come home with one or two cold burritos in his lunch pail; I would always try to be the first to greet him so that he could hand me his lunch pail, ensuring that I’d get first dibs on one of his cold burritos. It was later in life when he let it slip that he would often stay a little hungry because he’d save a burrito for me and one for my little sister. It was completely unnecessary because my mom always made a big pot of chile verde and she could have made us 10 burritos, but he’d do it anyway because he loved how excited his little girls got over his cold leftovers
THE INGREDIENTS
Pork Chile Verde is what people call a guiso or guisado, a stew or cooked dish, usually a meat or protein of some sort cut into small pieces and slow simmered in a sauce, usually one with a bit of spicy kick. So this could be chicken in chile verde, or beef chile verde. If pork is the preferred protein, it can either be costillitas (pork ribs), spare ribs, or pork shoulder chunks. My son doesn’t like anything with bones so I make mine with pork chunks but if it were up to me, I’d make only costillitas. There is also my personal favorite, chicharrón en chile verde, made with the deep fried pork rind. Gonzalez-Northgate Market sells this guiso which in my opinion is the 2nd best, my mom’s version obviously being the absolute best. My sister recently introduced me to pork belly chile verde. My kid sister is a total game changer!
Tomatillos are of the nightshade family, sometimes called Mexican ground cherry or Mexican husk tomato. Tomatillos are a good source of dietary fiber, vitamin C and K. They have a husk that’s usually dry and resembles parchment paper. The fruit is green or purple with small seeds inside and they have a tart flavor. Tomatillos are native to Mexico and Central America. There is a smaller type of tomatillo called tomatillo milpero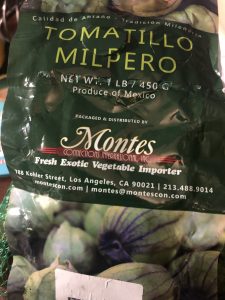
so when mom finds a good sale, she’ll use the milpero kind instead. Some people can’t tell the difference but I can. When she makes this dish with tomatillo milpero, the sauce seems more delicate and authentic. The salsa is less acidic and if the tomatillos are roasted, it takes your dish to a whole other level! Tomatillo and tomatillo milpero can be dated as far back as 800 B.C. where excavations in the Mexican state of Puebla have shown that tomatillos were used as far back as that time.
The way my mother roasts her ingredients is by placing a sheet of foil paper directly on her comal (smooth flat griddle) and constantly turning the whole tomatillos and other ingredients until everything is soft and has char spots here and there.
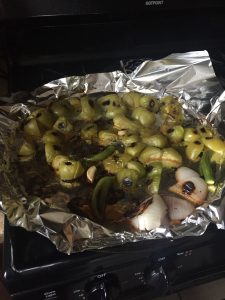
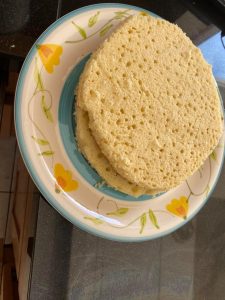
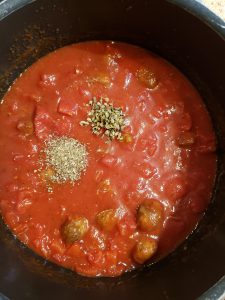
I have learned a slightly lazier (I chose to see it as a more effective, less time consuming) way of doing it, a “non-latino” or non-traditional way (my mom would call it a “gringa” habit) to reduce the cooking time as well as the possibility of burnt fingers and that is to cut the tomatillos in quarters, place them on a cookie sheet and stick it in the oven on broil for about 10-15 minutes. I take them out of the oven, turn the ingredients over a couple of times, and I put them back in the oven for another 10 minutes, depending on the amount of ingredients I am using. Sometimes I might leave them in longer or take them out sooner, this is one of those “Tu te vas fijando” situations that a lot of Latina moms like to use. This term in mom’s kitchen is like chef Roy Choi’s “Sohn Mash” flavor in the fingertips. In her kitchen it literally translates to “you’ll observe along the way” so this is where your sense of smell, taste, and most importantly sight kick in since real measurements are almost non existent here. Pretty much if it looks like the picture above or the picture below, you’re doing alright!
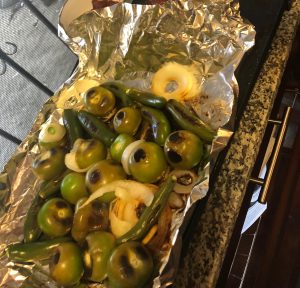
The other ingredients on my roasting pan are chiles serranos, onion, and garlic. Again, this is another little trick I learned along the way. I used to add raw white onion and raw garlic to my blender just like my mom taught me, but somewhere along the way, I discovered that if you add the garlic and the onion to the baking sheet along with the tomatillos, it gives the salsa a slightly sweet and smoky taste. Just think about it, sure raw garlic will still give your food a great taste, but roasted garlic is just plain magical! And slightly caramelized onion is bound to play quite nicely with the sweet and sour taste of roasted tomatillos.
As far as the types of chiles you use is completely up to you. You can go with jalapeno peppers which can be low to mildly spicy or you can go with serrano chiles which tend to be more on the spicier side. The great thing about a salsa verde guiso is that you can tweak it here and there to make it your own. Sometimes instead of adding cilantro and white onions to my salsa, I use roasted green onions. I do this for some of my poor, unfortunate friends who were born with an enzyme that makes cilantro taste like soap to them. I call my friends unfortunate because I love cilantro and couldn’t imagine hating the taste of it!
Now, this next ingredient is a bit controversial for some people. My mom’s not-so-secret ingredient is a generous amount of Knorr-Suiza brand chicken bouillon. The reason why I think it is controversial is because this is a beef or pork dish so why would you add chicken bouillon? This is always a question that comes up when I teach my non-Latino friends this recipe. They ask, ‘Why not use beef or pork bouillon?” First of all, “is there such a thing as pork bouillon?” The answer is probably yes, but I have never seen it in my mother’s, my grandmother’s or my numerous aunts’ kitchens so that’s not an option. I feel like beef bouillon just makes my food taste too salty so that is also not an option. I simply tell them what my mom told me, which is “Do you want your food to taste good or no?” Just don’t question it and add as much or as little as your batch of chile verde needs. “Tu te vas fijando.”
It’s the most widely used ingredient in Mexican moms’ kitchens! Don’t use any other brand or you will offend your antepasados, your ancestors! Also, if you feel like your dish (chile verde or any other guiso) is missing something but you’ve already added enough salt, gradually add a bit of Knorr until it tastes just right. My Grammy taught me that!
The final ingredient in my opinion is optional and that is cumin. I am not a fan of too much cumin and cumin is one of those spices that one sprinkle too much and it overpowers your entire guiso. Too little and you can’t taste the difference. I would say to tread lightly with this spice.
TIME IT TAKES TO COOK CHILE VERDE
Time it takes to cook this can vary by the amount you plan on cooking. When my mom makes it for the entire family, it can be a bit time consuming because you have to take the husk off of the tomatillos, pull the tails off the chiles and, the most time consuming part, cut the pork shoulder in small to medium pieces. When made with spare ribs, the carnicero (butcher) usually cuts the ribs for you so that saves time. However, pork shoulder takes less time to thoroughly cook than spare ribs. Spare ribs, you have to allow them to release all the fat and then you allow that same fat to essentially burn itself out, allowing the ribs to pretty much deep fry without adding more fat which gives them a nice, crispy outer layer while keeping the meat fall-off- the-bone tender. Sometimes when my mom is in a hurry, she cuts corners and drains the fat but that doesn’t allow for enough crispiness, in my opinion. Pork shoulder on the other hand, has less fat and will not need to cook as much, but you do have to add a little bit of fat or oil to get the browning of the meat. Once the meat is done and the salsa is well blended and added to the pot, it really only has to simmer on low to medium heat for about 15-20 minutes. Obviously the longer you allow it to simmer at low heat, the better this guiso comes out. Patience is truly a virtue with Mexican cuisine. It took hundreds of years for this recipe to be perfected, I think the man I’m trying to trap can wait a few extra minutes.
SIDE DISHES TO GO WITH PORK VERDE
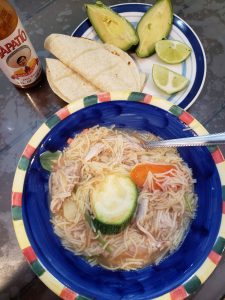
Plain white rice was and continues to be a staple in my household. Especially when a guiso like this is on the menu for the day! In fact, you’re kind of expected to eat rice along with chile verde. If money was extra tight and mom only had enough to buy a small amount of meat, sometimes your plate mostly consisted of white rice generously smothered in salsa verde with like 4 or 5 chunks of meat. If money was extra, extra tight, a hearty portion of frijoles de la olla, fresh cooked beans, went a long way! And you can’t forget tortillas! I always chose flour tortillas over corn but every once in a while, when my mom would make handmade corn tortillas to go along with this savory piece of heaven, I’d make an exception and happily take my two (or more) corn tortillas!
LET’S GET STARTED!
I chose to make pork shoulder because that is the cut of meat that I had on hand.
I used about a 3lb piece.
3lb pork shoulder (cut in small to medium chunks)
2 1lb packages of tomatillo milpero
½ of a white onion cut in quarters
4 medium to large cloves of garlic (less or more according to your preference but I recommend 2 cloves minimum)
1-1 ½ cups of cold water
7-10 Serrano peppers or about 10-15 jalapeno peppers
½ or a little less than ½ of a cilantro bunch
½ teaspoon of oil or lard (if needed)
A pinch and 1tsp each of salt and pepper or to taste
Approx. 1 tbsp. or to taste of Knorr Chicken bullion
1/8 tsp. of cumin (optional)
Instructions
Preheat oven to broil setting.
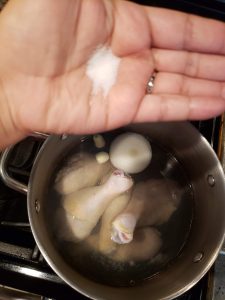
Cut pork shoulder into small to medium sized pieces and season with a generous pinch of salt and pepper and set aside.
Remove husks from tomatillos and pull the tails off of the chiles serranos. Rinse thoroughly.
Since you’re using tomatillo milpero it isn’t necessary to cut them in quarters.
Peel garlic cloves.
Spread the tomatillos, quartered onions, garlic cloves and chiles serranos on a baking sheet and broil for 10-15 min.
While the tomatillos broil, brown pork chunks until golden brown. Add additional teaspoon of salt and pepper to taste.
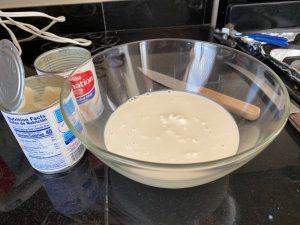
When tomatillos are done roasting, add ingredients to a blender that already has 1 cup-1 ½ cups of cold water. Note: Be very careful when using a glass blender because the hot ingredients can shatter the glass if you add them before the cold water. If possible, allow the roasted ingredients to cool down a bit before blending. Also, be mindful of your chile amount. I would say to add a few at a time and stop when you achieve the level of heat you can tolerate. Sometimes you will use all your chiles and sometimes you might leave 4 or 5 behind. Along with tomatillos, chiles, onion and garlic, add the cilantro and blend to your heart’s content.
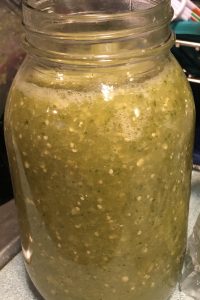
Once the salsa is blended, you will see that you made way too much. I don’t know how to fix this problem and neither does my mom. No matter how much I try to adjust the amounts, I always end up with way too much salsa. You can save part of the salsa for tacos or chilaquiles verdes (another one of my all-time favorite Mexican dishes!) later in the week or you can bless your other single friends so they too can have the base for their Trap-A-Man recipe. Add the salsa you are not keeping to the pork chunks, add a bit more salt, and slowly start adding the chicken bouillon. Allow it to simmer on low to medium heat for a few minutes and keep tasting to see if you need to add more salt or bouillon.
Once you achieve the level of yummy worthy of the praise of our Aztec ancestors, serve your man and watch him fall madly in love with your cooking. I’ve yet to find the gentleman worthy of being served my very own trap-a-man recipe but if it worked for my mother and sister, it will work for me and you, dear reader.

Works Cited
Choi, R., Nguyen, T., & Phan, N. (2013). L.A. son my life, my city, my food. New York, NY, NY: Ecco.
Young-jin, K. (2014, December 14). A chef’s dramatic LA journey. Retrieved March 07, 2020, from https://www.pressreader.com/korea-republic/the-korea-times/20131214/281964605531660
Unknown. (2018, December). Milpero Tomatillos. Information, Recipes and Facts. Retrieved March 07, 2020, from https://specialtyproduce.com/produce/milpero_tomatillos_8674.php


 everal variations of rich sauces that come in colors like yellow, red, black and even green (Cocking 2016). Mole is made from various
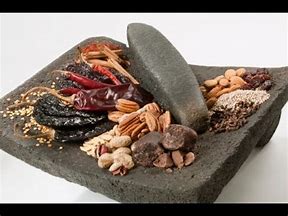
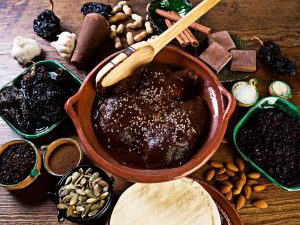 gradients that are grounded into a paste then thinned with broth, Mole is our favorite rich, spicy sauce that we enjoy with chicken at many festivities. Mole can take up to two days to prepare, however, that the same Mole paste can also be purchase by the pound in traditional Mexican outlets like El
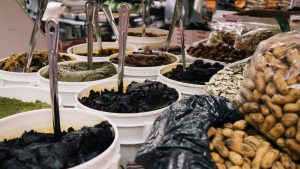
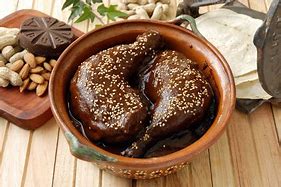 ble too because is delicately prepared by the women in the family, who gather and share their cooking skills. I consider the preparation of food as a family to be one of my family’s traditions. Mole served with rice is one of the many, if not our favorite, foods to prepare as a family. My family’s favorite mole is the Mole
  perfect growing ground for rice (Bowman 2013). Rice can be enjoyed with beans and choice of meat as seen in Mexican restaurants. Rice is not only reserved as a savory dish, but it is also used in desserts, cakes, vegetable puddings, tamales,


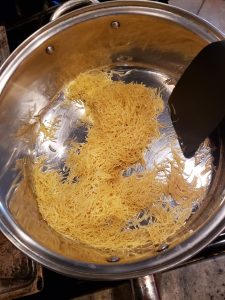
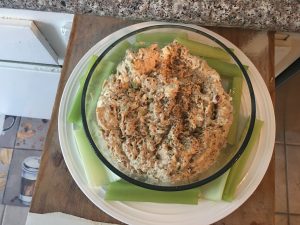
 Strain water from noodles, add cream cheese, sharp cheddar cheese, and butter, stirring it gently together until fully melted. Add chicken broth, seasoning salt, ground pepper, garlic powder, and onion powder, then stir until thoroughly mixed. Carefully mix to avoid chopped noodles.


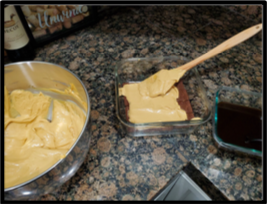
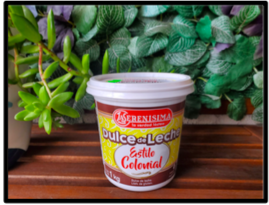 The most important ingredient of the Chocotorta is the dulce de leche. Without this ingredient, you are unable to have a proper Chocotorta. My preferred brand of dulce de leche is La Serenisima. I was able to locate this item from an Argentine market located in the City of Redondo Beach.
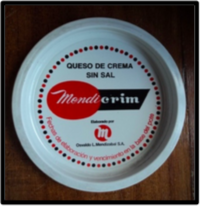 The original recipe called for Mendicrim. Mendicrim is a type of cream cheese that was made by The Mendizabal Company. Mendizabal is no longer in operation. The original recipe was purchased by the SanCor Company. Sancor currently sells a similar version of the product.
 For my recipe, I was unable to obtain Mendidrin, so I utilized the Lucerne brand of cream cheese. The Lucerne cream cheese worked very well with the La Serenisima dulce de leche. I was able to locate this item at an Argentine market located in the City of Redondo Beach.
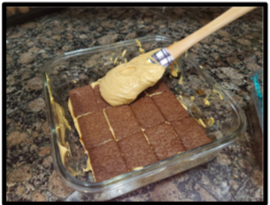
 Chocolinas are simple chocolate cookies from Argentina. The cookies are not very great on their own. The cookies are chalky, dry, and leave crumbs everywhere; however, they are the perfect cookie for this recipe. I was able to locate this item at an Argentine market located in the City of Redondo Beach.
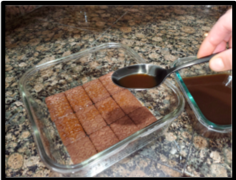
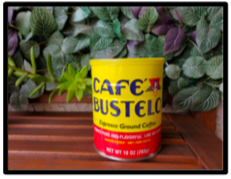 Coffee is also another very important part of this recipe. It helps balance out the sweetness of the dulce de leche. The coffee is utilized to moisten the Chocolinas before layering them into the pan. You also use the coffee grounds in between the layers of the Chocotorta. You are able to purchase this coffee at most supermarkets.
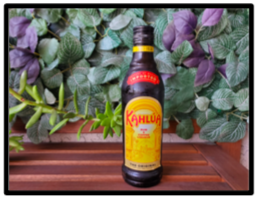 The original recipe did not include Kahlua; however, mine does. The Kahlua gives it an extra something. It makes the cake taste extra delicious. This item is available at most supermarkets.

