Lemon Chicken and Potatoes

Hi, Im Emily. I am a senior in the IDS program.  I am a traveler but I dont like taking photos.  I have been to Europe, Canada, and most of the United States.  I like to consider myself a cook and I take after my grandmother who criticizes every dish put infront of us.  Thankfully, unlike her, I know how to cook.  I am part Greek and I have inherited the Greek need for lemon, garlic, and fresh food.

My favorite dish is Lemon chicken and potatoes.  That is my staple food.  Although I enjoy greek food, I am adicted to sweets.  I am pretty sure that I am so close to having diabetes.

To make lemon chicken the greek way is to heat the oven to 375F.  Then take the chicken brest or what ever chicken you want, rub it down in salt, peper, and minced garlic.  Next you cut red or golden potatoes into wedges an place in a pan that has at least two inch high sides.  Pour olive oil on the potatoes and sprinkle salt and peper over the potatoes.  Next, place the chicken over the potatoes so that they are sitting ontop of the potatoes. (note: you can substitute the potatoes for Orzo, the greek pasta.  Only thing you need to do is add a cup of water to the pan. The ammount of water depends on the quantity of orzo.)  Squeeze half a lemon over the chicken and potatoes.  Place in oven and set a timer for 15 min.  When the timer goes off squeeze more lemon on the chicken and potatoes. (If you are doing orzo put a little more water in the pan if the orzo is still looking raw.)  Cook for another 30 min.  The chicken and potatoes will be done when the potatoes look golden brown and the chicken is slightly brown.  When you take out the chicken squeeze a little bit more lemon on the chicken and potatoes.  Lemon flavor likes to cook off.  and you are done.

Last time I hade good Lemon chicken was in Greece.  It paired really well with red wine only because I love red wine, even though you are supposed to pair white wine with fish and chicken.

-Emily11817212_10205712980478052_6353283073420404876_n

Spanish Rice!

agw7tzwgq1m8klctyfvg_spanish-rice-3

Spanish Rice, or as I like to call “Grandmas Orange Rice.”

I chose Spanish Rice for my food presentation, as this has always been a very sentimental dish to me. My grandmother Ernestina is a second generation Mexican-American from a city called Guadalajara. She had 5 brothers and 1 baby sister, and was considered to be the cook of the siblings. She also has been a housewife for the last 50 years, therefore has cooked my grandfather each breakfast, lunch, and dinner. My grandmother is a phenomenal cook however her Spanish Rice has always been my favorite since i was a kid. I myself having 2 brothers and 3 sisters, have also been bestowed as the cook of all of us. I have truly mentored my grandmothers cooking and continue to do hoping I become just as good. This particular dish took me roughly 2 1/2 hours (longer than normal rice) to make and I confidently say its pretty darn close to hers.

A little bit of background information I found when researching Spanish Rice was that it has went a long way from its origin. When the Islamic Moors (from North Africa), ruled Spain in 711 AD, they introduced rice. Spain then brought this rice to Mexico through the port of Veracruz. The Spanish also introduced this type of rice to the Philippines so there is also a heavy influence there. With each migration, the recipe has been slightly modified but overall pretty consistent. The basic necessities for Spanish Rice are white rice, tomato sauce, onions, water, lemon, salt and pepper. All of these items combined in a pot with a low simmer will create a creamy dish (in different quantities of course). What I love best about this dish, is that rice is universal. I made it a point to acknowledge how rich and poor it can be. It can be dry or creamy, as well as eaten alone or complimented with protein.  Although this is a simple recipe, I have yet to find a restaurant or store that makes it as wonderful as my grandmothers.

From the Backyard Garden to the Table – 500 Word Post

Harvest

Harvest

Despite the advancement of African American people and the political correctness era ushered in the 20th Century themed movement of the civil rights, slavery remains a dye that continues cast a stain upon the consciousness of American society. Humans were forcibly made to become the chattel of other men, and, therefore, forced to serve their owners in whatever capacity they deemed necessary, whether it be working in the fields or serving in “da big house,” or for mere entertainment purposes.  Most notably, though, our broken history teaches the masses that slaves were imported for the sole purpose of providing free, uncontested manual labor and agriculture skills.

As an African American female child, I raised to be self-sufficient and independent.  My parents believed in gardening and taught us kids the art of sowing, planting, and harvesting.  “You Reap What You Sow” was a phrase that was spat, daily.  My Mother was particularly fond of letting those words flow from her lips, especially when it applied to the directing of physical labor (namely, mine (LOL)).  At my young age, I was incapable of grasping the significance of the lesson being taught.  I did not comprehend that the act of gardening was a means to an end.  I was too young to appreciate that my parents were imparting the symbolic teachings and traditions of our ancestors, who once sowed the seeds of sustenance and survival for a nation, while in bondage.

Even though many years have passed, it still feels as though it were yesterday.  My recollection is chock full of sharp memories of gardening under the strict and loving guidance of my parents.  Yes, I witnessed the birth and rebirth of that fertile patch of land reserved behind the garage, surrounded by a temporary fence protecting that precious patch of land.  Dad’s enclosure was held together with hand carved wooden stakes, fishing wire, coils, and hinges assembled in his garage.  Just beyond the garage, laid a protected vegetable sanctuary, readying itself for consumption.

Each year, my own urban garden, with its eco-irrigation system, yields onions, greens (collards), tomatoes, eggplant, berries and other root vegetables.  The practice of gardening allows me to pay homage to the men and women stripped from their Diasporas.  Through gardening, my family taught me to recall the horrors of the past and recent past. And after each harvest, I am reminded of the earth’s renewal.  But more importantly, I am reminded of the responsibility of passing along the historical knowledge of gardening to the next generation.

By honoring, respecting and preserving centuries-old customs, I am ensuring that the legacy of the past remains relevant. Gardening is a tradition that requires commitment.  One must be willing to work the land, feel the dirt between your fingers and protect the ground.  In doing so, a sense of pride and accomplishment is achieved, together with a profound sense of appreciation for “mother earth.” Knowing that that same soil you nurtured, will soon spring forth a bounty of life, grown by your hands is a cathartic experience.

On a personal note, reflecting on these memories has reminded me that despite my family’s humble beginning, we had an abundant life and I had a great childhood.  Our dinner table was always filled with bowls of delicious green vegetables, bread and potatoes or rice.

From the earth to the table

From the earth to the table

http://www.tasteofsouthern.com/

Pumpkin Cheesecake Pie

20161121_220449

I forgot to take a picture of the pie and by the time I remembered this is all that was left.

I started baking with my mom when I was 15, because she used to sell cakes and the main type of cakes she made were for weddings and quincenieras they 3 or 4 tier cakes, so they were a lot of hard work, it took all weekend long. And I hated it because I knew it was going to be a long weekend. It was going to be baking and decorating all night long and all day long from Thursday to Saturday.

So when she finally stopped baking cakes to sell I was happy, although… she still baked she would experiment  creating different types of dessert recipes for our family functions, so baking became  fun again, because it wasn’t ALL THE TIME and it wasn’t all weekend long.

One year during the holidays I was working and we had a thanks giving potluck the week before thanksgiving and someone brought in a pumpkin cheesecake pie and I really don’t like cheesecake but I do like pumpkin. So I was curious to try it. I tasted just a little piece and I fell in love with it. So I asked for the recipe and she sure she would bring it to me the following day, a secret recipe but she gave me a print out from the Food Network which was ok, but I was expecting her grandma’s secret recipe.  I wanted to impress my family for thanksgiving so I volunteered to bring pumpkin pie for our family Thanksgiving dinner.  On Thanksgiving Day I woke up bright and early and went shopping for all ingredients to make my pies .  When we get to dinner I see two packaged pumpkin pies from food for less on the table I was so upset , because I was in charge of the dessert and I worked so hard and I was in charge of dessert and he was in charge of something else  and he brought pumpkin pies from food for 4 less. But I didn’t say anything.  I noticed somebody opened the packaged pies and everybody started eating from those pies and nobody touched my pies, and I was so hurt and upset that I left early and I did take my pies with me.  The next day everyone came over to our house for left overs, for the turkey sandwiches because we always have the tradition of eating left over Thanksgiving sandwiches. And my mom said, “Oh take out your pies.” And I said,” No I am not going to take out my pies, because they didn’t want to eat them last night, so I am not going to share them today.” She ignored me went and took out the pies,  and finally somebody tried my pies and of course they fell in love with it and I knew that they would. Now every year they beg me to make my pumpkin cheese cake pie.


Origins of the pumpkin pie:

In 1621- Early American settlers of Plymouth, Plantation, the first permanent European settlement in southern New England might have made something like a pumpkin dessert by using a hollowed out pumpkin filling it with milk, honey and spices, then baking it in hot ashes. An actual present day pumpkin pie with crust did not exist, as ovens to bake pies were not available the time

Northeastern Native American tribes grew squash and pumpkins.  They roasted or boiled to eat. Historians believe that settlers were not very impressed by the Indians squash or pumpkin until they had to survive their first harsh winter when about half of the settlers died from scurvy and exposure. The Native Americans brought pumpkin.  This is what developed into pumpkin pie about 50 years after the first Thanksgiving in America!

My Food Presentation: Applesauce

Apples slowly cooking and lightly dusted with pumpkin spice.

Applesauce in the making…slowly cooking and lightly dusted with pumpkin pie spice. Yum!

 My presentation is going to be something that I have shared with my children since they were old enough to eat. I’ll be sharing with the class my homemade applesauce. Most people have had applesauce at some point in their life as a first baby food, as children in their lunchboxes, or on a pair of mom’s pork chops. Applesauce can be pureed until smooth, or as I have made it, slightly chunky. It can be sweetened with apple or orange juice, brown sugar, honey or maple syrup, or if the apples are sweet enough, you need nothing at all. I’ve experimented over the years and I’ve come to sweeten it with a little organic apple cider, and a little dusting of pumpkin pie spice for seasoning. Applesauce is believed to have originated in Germany and was call apfelmus, though other western European and Scandinavian countries had their own versions over time.

While this isn’t a tradition in my family, as I didn’t really have any, I wanted to start a new one with my own children. I didn’t have much of a role model for cooking when I was a child. My mom was adamant about her children not being in the kitchen when she was cooking – so learning how to cook wasn’t an option, unless you count Home Economics classes in middle school. Instead, I learned to cook much later in life and actually, from my ex-mother-in-law. She was exceptional at throwing food together without instruction and I inspired to be like her. Just as she had been kind to me in teaching me how to cook and sharing her recipes with me, I wanted to someday do that with my own children. When my daughter was old enough to safely help me in the kitchen, we cooked our first batch of apples from Oak Glen and canned them as well so we could have them for later. I felt good that my children would be eating something fresh, organic, and healthy and that I knew every ingredient that went into it. I loved that my daughter could help not only in making the applesauce, but has learned the lost art of canning. She is much older now and I’m glad she still has an interest in cooking with me.  My son is still small, but he, too helps me in the kitchen and pretends to make me things to try. I’m glad that I chose to share my kitchen, this recipe, and other skills with my children. I hope they continue the tradition someday when they have children of their own.

Apples have been around for millions of years originating in the mountains of Kazakhstan. Archaeological finds have indicated that apples have been part of the human diet for over tens of thousands of years. Though North America had native apples called “crab apples”, in the U.S., apples began their profitable history arriving in Jamestown in the 1600’s, but they were not the sweet versions we have today. They were very tart and they were almost solely used to produce cider since it was a favorite and safer drink of the English colonists. Cider also became somewhat of a currency in the colonies, proving to be more profitable than tobacco. Over time, the French would introduce more edible varieties and over time, new breeds would be developed by the system of grafting and gene crossing.

Today, American’s eat about 19 pounds of apples each year, and they are grown in every state in the U.S.  Over 7,500 types of apples exist today. There are about 7,500 apple orchards, producing about 48,000 tons each year to make $2.7 billion each year, making it the third most profitable crop behind oranges and grapes. One cup of chopped apple with skin is about 65 calories, and has low carbohydrates, good fiber, anti-oxidants, potassium, folate, niacin, and vitamins A, B, C, E and K. Apples are touted to lower the risk of stroke, cancer, diabetes, tooth decay, and developing Parkinson’s and Alzheimer’s disease.

Guatemalan Tamales

img_1774
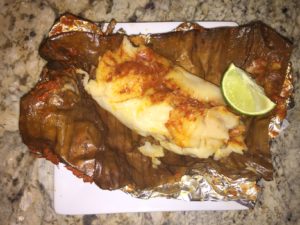
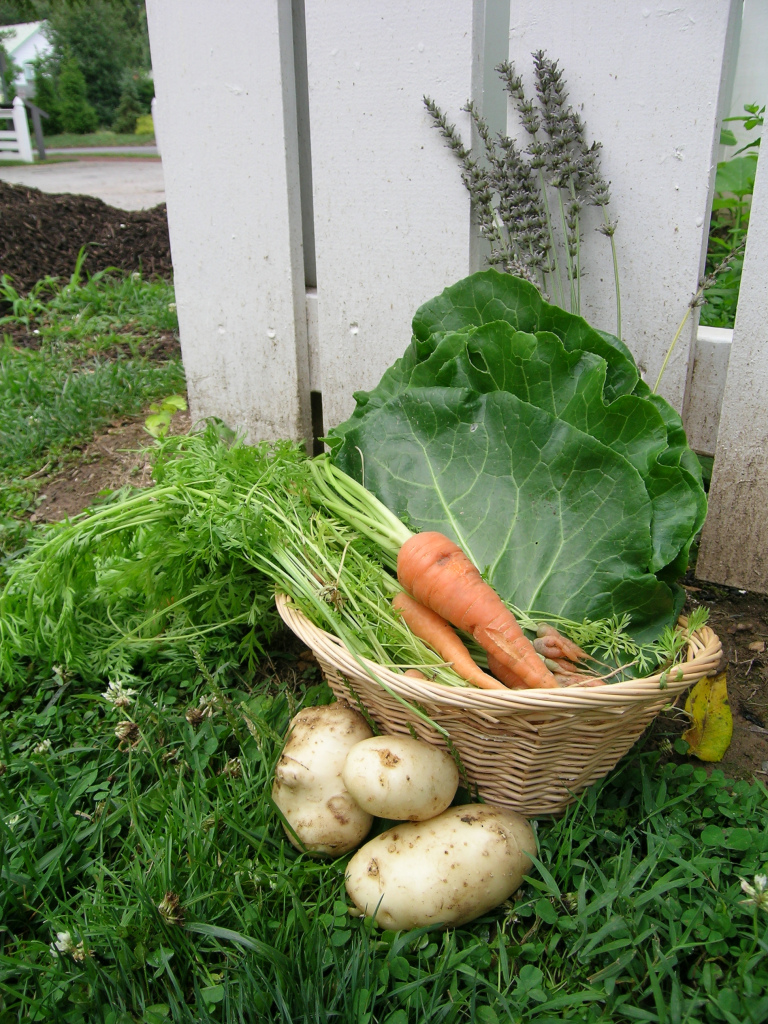
Tamales are typically enjoyed in Guatemala during Christmas and New Year’s but they are usually made for the weekends, specifically, Saturday’s. There are three different variations of the Guatemalan tamale that include: Colorado (red), negro (black), and chuchito (loosely translates into little dog). There is also a smaller tamale that is called a pache. The only difference is the pache is made from potatoes rather than corn masa and they are only sold on Thursday’s, starting to see a trend here? Guatemalan’s definitely like to know what they’re eating on certain days of the week. Kind of like Taco Tuesday here in the United States. Tamales in the United States are available through Guatemalan panaderias or bakeries. They are few and far between so I like to cling to the one we have frequented for the last 10 years Panaderia Guatemala located in Harbor City near the corner of Lomita Boulevard and Normandie. Tamales are usually served with a side of Guatemalan bread called a Pirujo, which is a lot like Hawaiian bread but a bit less sweet. It is also necessary to have a fresh slice of lime to squirt on top of the tamale to impart freshness.

The only person in my family that I have actually seen make tamales from scratch was my great aunt my mom’s side, may God rest her soul. I hold her dear in my heart because she was also our nanny until I was about 13, when she passed away from cancer. She did all the cooking and cleaning for the family, and she was kind of like my mother since my actual mom was off working, and I never saw her very much.

I often think that our Guatemalan ancestors were either really devoted to food or perhaps just had a lot of time on their hands. Nowadays, when we need tamales we just order them from the bakery and they magically appear warm and ready to go the day of. Although there are simpler recipes online, I wanted to share one that was as authentic as possible. The recipe that follows is one that I gathered from my grandmother telling me how to make them, since my family has no actual written recipe and one that I found online at, The Weiser Kitchen, that is the closest in flavor, process, and style.

Ingredients:
For the Sauce:
8 tomatoes whole
2 large yellow onions, peeled, cut in quarters
1 pound medium tomatillos
4 garlic cloves, peeled
1 tablespoon canola oil
3 fresh bay leaves
3 teaspoons fresh thyme
1 ounce dark chocolate
2 dried pasilla chiles
1 dried guacque (huaques) chile or dried guajillo chile
2 cups reserved chicken stock

Crack or cut open the dried peppers, then shake out the seeds and snap off the stems. Tear or cut into coarse pieces and place in a large bowl. Warm 2 cups of the reserved chicken cooking liquid and place in the bowl with the peppers. Let stand, uncovered, for 5 to 8 minutes.
In a strong large blender or in a food processor, blend or process the tomatoes, onions, tomatillos and garlic until smooth, in batches if necessary. Transfer to a bowl.
Add the softened peppers and pepper soaking water to the processor and process until completely smooth. If the mixture is not completely pureed, you must strain it, no lumps allowed here!
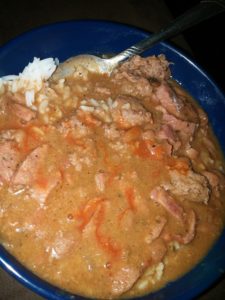
Heat the oil in a large pot over high heat until shimmering. Add the pureed tomato and tomatillos, pureed peppers, bay leaves, and thyme. Cover and bring to a boil, then reduce heat to simmer and add the chocolate. Cover and cook over low heat for 1 hour, stirring occasionally.
For the Spice Mix:
1 (2-inch) cinnamon sticks
3 tablespoons sesame seeds
2 tablespoons pumpkin seeds
1 teaspoon whole cumin seeds
½ teaspoon whole cloves
1 tablespoon rice flour

These must be toasted. Yes, all of them! In a food processor, finely grind the cinnamon, sesame seeds, pumpkin seeds, cumin, and cloves. Stir into the sauce. Whisk in the rice flour, and simmer over the lowest heat possible, 45 minutes. (Sauce can simmer for up to 3 hours, as long as it is covered and stirred occasionally to prevent burning).

For the Chicken Filling:
2 pounds chicken breasts
4 cups water
4 garlic cloves, peeled
3 celery stalks, leaves attached, roughly chopped
1 large onion, skin, stem, and root end removed
4 bay leaves, fresh preferred
1 teaspoon salt
½ teaspoon whole black peppercorns

In a large pot add all of the chicken filling ingredients. Cover and bring to a boil over high heat. Reduce the heat to a simmer and cook until the meat is fork tender, 45 minutes to 1 hour.
Remove the chicken from the cooking liquid and transfer to a bowl. Skim, strain and reserve the liquid. Pour broth over the meat until just covered. Reserve the remaining broth. Cool the meat in the broth. As soon as you can handle the chicken, remove the meat from the bone, tear into strips and return to the broth. The chicken can be prepared up to 2 days in advance. Cover and refrigerate the chicken in the broth.

For the Masa:
12½ cups of water, chicken stock or strained cooking liquid from the pork and/or chicken
2 pounds masa harina (instant masa)
8 ounces unsalted butter
½ cup canola oil
2 tablespoons kosher salt to taste
1 whole large yellow onion, peeled, stem, and root end removed
2 tablespoons kosher salt, or more to taste

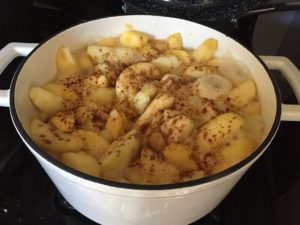
Combine the water and masa in a large pot over medium heat. Cook, stirring, until warm, then add the butter (in chunks), whole onion, oil and salt. Continue to cook, stirring (like your life depended on it) with a strong spatula, until the masa thickens and becomes very pale in color (like cream of wheat), and a pasty residue appears around the pot, at least ½ hour. Remove from heat and transfer to a lightly oiled bowl. Cover with foil.

The leaves for Wrapping the Tamales:
40 large banana leaves, frozen and fully defrosted, or fresh
Parchment paper cut to size, each approximately 9 by 13-inches
4 red bell peppers, julienned or cubed
Green Olives (optional)
Kitchen twine

Fit a large pot with a steamer rack or a pasta insert and fill the bottom with any remaining stock and water to about ¼ to ½ inch below the steamer rack or the bottom of the pasta insert. Lay 1 to 2 banana leaves on the steamer to cover. Cover the pot, bring to a boil and reduce to a simmer while you make the tamales.
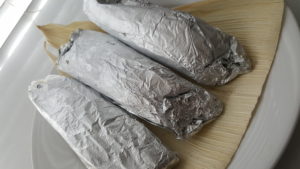
Place a piece of parchment paper on a work surface. Fold one long side of the paper over, about ½ inch, creating a small ledge (see the picture). Lay a banana leaf on the paper. Place ¼ cup masa on the leaf and flatten it out. Place 1 tablespoon sauce, then 1 tablespoon or about 1 ounce chicken over the masa. Add a few peppers or olives if you like them.
Fold the 2 short sides in towards the center until almost touching. Take the long side of the paper without the small fold and fold it over towards the center, Take the last side with the fold and fold it into the center to form a packet. Flip over and tie with kitchen twine both lengthwise and widthwise. (Or use a spare banana leaf, torn into strips). Place the packet, standing up in the steaming pot and cover. Make sure the water remains at a bare simmer, replenishing as necessary, without splashing the tamales. Repeat with remaining tamales.
Cover the packets with all remaining banana leaves. Cover the pot and steam for at least 45 minutes or up to 2 hours. Depending on the size of the pot here, remember that it could take up to 6 hours if you are using a traditional Guatemalan pot that can hold many tamales at the same time.

References

“Authentic Guatemalan Tamales – Bohemian Bowmans.” Bohemian Bowmans. N.p., 2016. Web. 16 Nov. 2016.

G., Victor, Jasmine G., Sandra B., Yessy M., and Jason M. “Guatemala Bakery – Harbor City – Harbor City, CA.” Yelp. N.p., 2012. Web. 16 Nov. 2016.

“Guatemalan Baked Goods … Cubilletes, Pirujos, Etc? – Chowhound.” N.p., n.d. Web. 16 Nov. 2016.

“Guatemalan Tamales for Christmas: Colorado, Negro & Chuchito.” AntiguaDailyPhoto.Com. N.p., 2016. Web. 16 Nov. 2016.

Weiser, Tammy Ganeles. “Guatemalan Tamales with Chicken | The Weiser Kitchen.” The Weiser Kitchen. N.p., n.d. Web. 16 Nov. 2016.

Eggs-A Nostalgia Food

eggs-are-nutrition

Symbolic analysis:

The symbolic analysis for the food I remember as a child, and throughout my life is the egg.  Growing up, eggs were nostalgic and a staple food in our kitchen. Eggs were used and cooked in all sorts of ways, and especially when there was nothing else to eat. I connect to eggs as far as I can remember. First, in kindergarten, my mother would send me to school with egg sandwiches for lunch. I was embarrassed at the time because other classmates were able to bring bologna sandwiches, pressed ham, and other meats we could rarely afford. I was embarrassed because we were poor and didn’t have much to eat sometimes. By time I reached high school age, I used to cook myself an egg sandwich in the mornings for breakfast. Since that time, I have learned to appreciate eggs and now understand why my mom kept eggs in the house when the refrigerator was practically bare. She must have had knowledge of it’s nutritional value.

Eggs Background

According to East Indian history, wild fowl were domesticated in 3200 B.C.  For the Egyptians and other Chinese, the records show fowl were laying eggs as early as 1400 B.C. and 600 B.C. When eggs arrived in America, there were over 200 different breeds of chickens. In addition, U.S. hens usually are the Single-Comb White Leghorns. During the 1900-1920’s, people produced eggs mostly in their backyards, and those eggs were supplied to family members. Extra eggs were sold to Farmer’s Markets. Hens were laying approximately 150 eggs per year, with a 40% mortality rate.

In today’s economy, over 300 million laying birds produce 250 to 300 eggs a year each. The total U.S. egg production has grown to over 75 billion eggs a year.

Nutritional analysis:

Eggs are one of the most nutritionist foods their are. For example, one egg has six grams of protein, and the egg yolk itself has a high nutrient density. Did you know that egg yolk contains choline which promotes normal cell activity, liver function and helps to transport nutrients throughout the entire body? Eggs has 70 calories, no carbohydrates, and contains no sugar. The egg shell has 7 to 17 tiny pores on the shell surface, and eggs have all 9 essential amino acids. In fact, one large egg has 13 essential vitamins and minerals.

Most of the vitamins and minerals are in the egg yolk, so when you throw out the yolk you throughout 40% of vitamins and minerals. The white of an egg has 60% of the eggs protein. Are eggs bad for you? If you suffer from allergies, eggs can cause allergic reactions, and eggs (specifically the yolk) is not recommended for those with high cholesterol.

Political-Economic analysis:

In the political-economic arena, legislation has recently been passed in the U.S. requiring egg farms to go cage free. Cage free systems are defined as systems were hens that are kept indoors must be able to roam free in an open area. Cage free systems usually have hens roam inside a building, a barn or poultry house.

U.S policies requires that facilities in most states comply by changing over to cage free systems. Farmers are expected to change over to cage-free facilities to stay in compliance with the law. Rose Acre Farms is one of the largest egg producers who recently changed to a cage free facility.  bMore hens die from injury in fling, and having more direct interaction with other hens in cage free systems.


Intro for Tiffany McKinley

Hello everyone!! My name is LoriTiffany McKinley. My major is Interdisciplinary Studies. I plan to graduate in May. I am super excited! Once I am done with my bachelors, I plan to get my masters in Negotiation, Conflict Resolution and Peace-building at Dominguez. I enjoy Dominguez so much I would love to get my masters there. My favorite food is red beans and rice, fried chicken and corn bread. Like I mentioned in the introduction of this course, this is my favorite meal because it was a meal my adopted parents cooked for my sisters and me. My dad made the best beans and rice. He started by soaking the beans over night, this made the beans extra creamy and thick once done. In a separate pot, he would cook the pig tails because they took a very long time to cook until the meat fell off bones. Then he added the seasonings to the beans and let them cook until for a few hours. Lastly, he would add the sausages and cooked pig tails and let the beans cook until they were thick. After our winter trips to Louisiana, my parents would bring home Louisiana sausages. When my dad made his beans with those sausages, they always came out better than ever. My mom made the best fried chicken. First, she seasoned the chicken with her special seasonings. Then she made the batter with flour and more seasoning. Next she dipped the seasoned chicken in egg then the batter. It usually took 20 minutes to cook a batch on medium heat. Once the chicken turned golden and crispy it was done. The corn bread was fairly simple. My sister usually made it. She followed the directions on the box, but typically added more oil, sugar and honey. I looked forward to dinner every time this was being made. To this day, I love this meal. I don’t have my dad’s recipe, but whenever I do want some all I have to do is ask him. He’s more than happy to give me his recipe, but every time I try to make them like his they never come out the same.

img_0580

Tamales

img_0581I did my presentation on my mom’s delicious tamales. Her tamales are really important to me because they were the first meal me and my mom cooked together. I was adopted at the age of 5. When I turned 18, I moved back with my biological mother. Before moving with her, I had only had her tamales one time. At that moment, they were the best things I had ever tasted. When I moved back with her it was only right that they were the first meal I requested.
The tamales are wrapped in corn husks (ojas). My mom is very picky when choosing the perfect oja. She have thrown away whole bags because they were not to her liking. The ojas must be cleaned because they have traces of dirt and corn hair. My mom soaks them water for some time then rinses them off one by one. The preparation of the masa is pretty simple. My mom only buys her masa from Amapola. They have the best masa around. But to add more fluffiness, she adds seasoning and oil. She then mixes it with her hands until it is not as sticky.
Spreading the masa on the oja is probably the hardest part (at least for me). The first time I ever made tamales with my mom, she had to redo every one I did. She says that the masa has to be evenly distributed because it cooks better. And she likes when her tamales have proportioned masa and meat. There have been times when she overlooked my disproportioned tamales and cooked them so, I definitely understand why she expects the masa to be spread in a certain way.
The meat is a secret! I will say that it takes hours to cook. My mom usually puts the meat to cook early in the morning on a medium heat. When she used to make pork tamales it would take a whole day because pork takes much longer to cook than chicken. However, I do not eat pork so, she stopped cooking them completely. The only time she does cook them is when family members ask her for a large order during the holidays. When I used to eat pork, she would make the red tamales with chicken and the green tamales with pork. I did not bring any red tamales but they are my favorite. I prefer them over the green but they are not as spicy as I prefer.
When the meat is done, she begins putting it in the masa. She likes to put a lot of meat in her tamales. When it’s time to wrap them she makes sure that each end of the oja has masa so the tamale stay closed. She said she do not like cooking tamales without wrapping them in aluminum foil because they do not cook as good. When I first made tamales with her, I thought it was okay to wrap the aluminum foil any way. Again, I was wrong. My mom likes to roll each end of the aluminum foil at least three times to retain the heat.
Once they are prepped and ready to cook, my mom uses her large tamale pot to cook them. She places a steamer at the bottom of the pot and puts a few cups of water in the pot. The water can not touch the tamales or they will be extremely gooey. She usually cooks a pot of 20 tamale for about an hour and a half. The more she adds the more time they require. I am happy that I am the only daughter who has the recipe.

Here is the link to Amapolas yelp page.

https://www.yelp.com/biz/amapola-super-deli-and-market-los-angeles

Mujaddara


Image by 


Mujaddara


I know, the name is hard to pronounce! Mu-jad-dara, I bet if you say it now it is not as hard as the first time. That’s right, many Middle Eastern foods have weird names, weird pronunciation, and  frankly, I do not know where they got the name. Growing up partially in Kuwait, and raised mainly in the United States, I never cared to know the meaning of this meal’s name. All I know is that it tasted good, since we eat lots of rice, and tastes great with a tangy small chopped salad,Yummy! In the process of writing about Mujaddara which is derived from the  Arabic language, I had to find the meaning and history of this meatless dish made in many countries in the Middle East, and known by the same name in four countries in that region.

Mujaddara literally means”chickenpox”  due to the pock-mark appearance of the brown lentils in the rice(Sarah McAnaw).I guess this dish is going to appeal to appetites after knowing the meaning! The History of this dish was, according to Sarah McAnaw, author of Small Kitchen College, goes back to one version of the  “mess of porridge” of the Geneva Bible., when Jacob offered Mujaddara to buy the birthright of his brother Esau.According to McAnaw and my mother Zakiyah Manour, this dish was of poor people or peasant’s food. It was considered a poor man’s food when a meal did not contain meat. So lentil soup and Mujaddara are one of such foods.

Mujaddara is very easy to make. In fact my mom used to make it on a lazy day, since she used to cook on a daily basis. I follow on that too. I cook Mujaddara once a month and the recipe is pretty simple and is not time consuming. The recipe uses rice, brown lentils, little spices,and sauteed onions for garnish which add a great flavor and little moisture to the “pilaf”.The recipe is simple and easy to prepare.Whether you eat the Mujaddara right away or  leave in the refrigerator for a couple of days, it should still be good to eat on those days where you are hungry and need something to eat quick.

Mujaddara Ingredients:

1 cup Basmati rice( washed and soaked 15 minutes then drained)

1/2 brown lentils

1 teaspoon black pepper

1/2 teaspoon ground cumin

1/2 teaspoon ground cinnamon

1/2 teaspoon salt (as desired)

1/2 teaspoon Allspice

2-3 onions thinly sliced

1/2 cup olive oil

5 cups water .

Chicken Stock(optional)can be added as half of the liquid in the recipe

Directions:

Boil the lentils in water and simmer till tender but not mushy. In the mean time, slice onions then add olive oil to frying pan on medium heat. Saute onions till they turn caramel in color. set half onions aside and add the other half to the lentils, then mix in the rice, spices, and salt. Bring to a boil . Water in the pot should cover the rice mixture .Lower the heat and cover the pot.Simmer for about 20 minutes ,till the rice is tender. If rice is not tender and water has evaporated add little water and keep on simmer till the rice is well done. Flip the pot and pour rice into a platter and garnish with the rest of the caramelized onions. Can be eaten with plain yogurt or with small chopped salad with lemon and olive oil dressing.Enjoy!!!


Source: http://college.biggirlssmallkitchen.com/2012/05/five-ingredient-feast-mujaddara.html